
Chimney Knoll Limewash Reveal
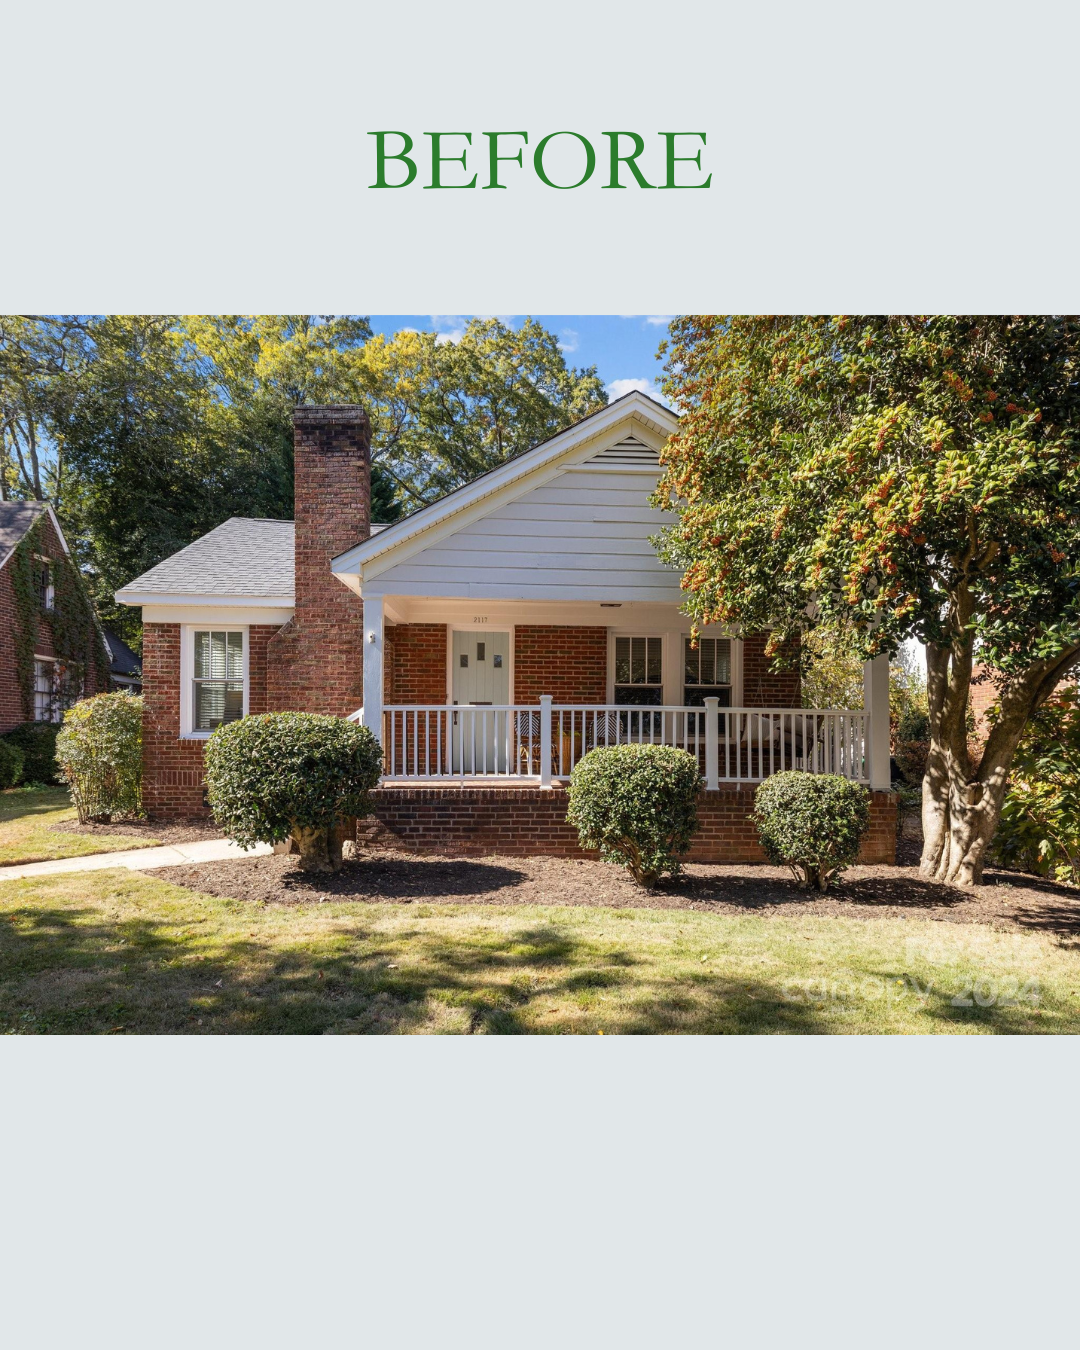
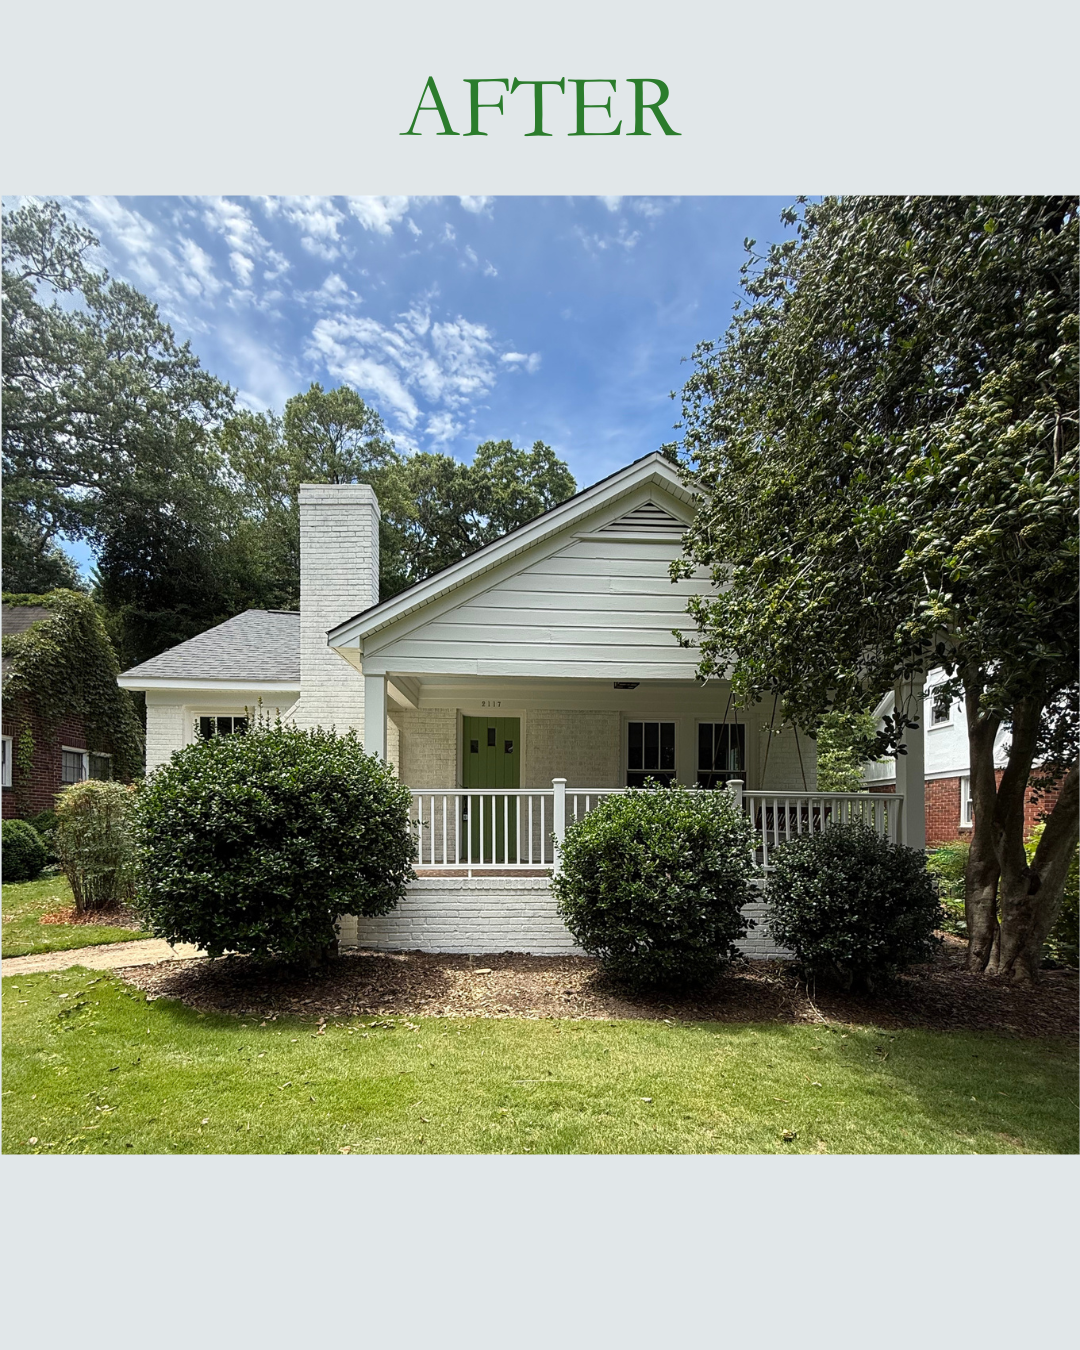
We have officially completed exterior painting at Chimney Knoll! Paint is normally something that is changeable, but paint on a natural finish like brick feels so PERMANENT (You can read more about the debate on covering the brick in the blog post linked here). I had a healthy amount of nerves about this project, but it turned out better than expected for this little bungalow.
If you recall, we had a “drive-by painting” incident in which no prep work was completed and unapproved colors were sprayed on the house all over the place - it looked like someone graffitied the house. So really, could the paint job on the exterior get any worse?
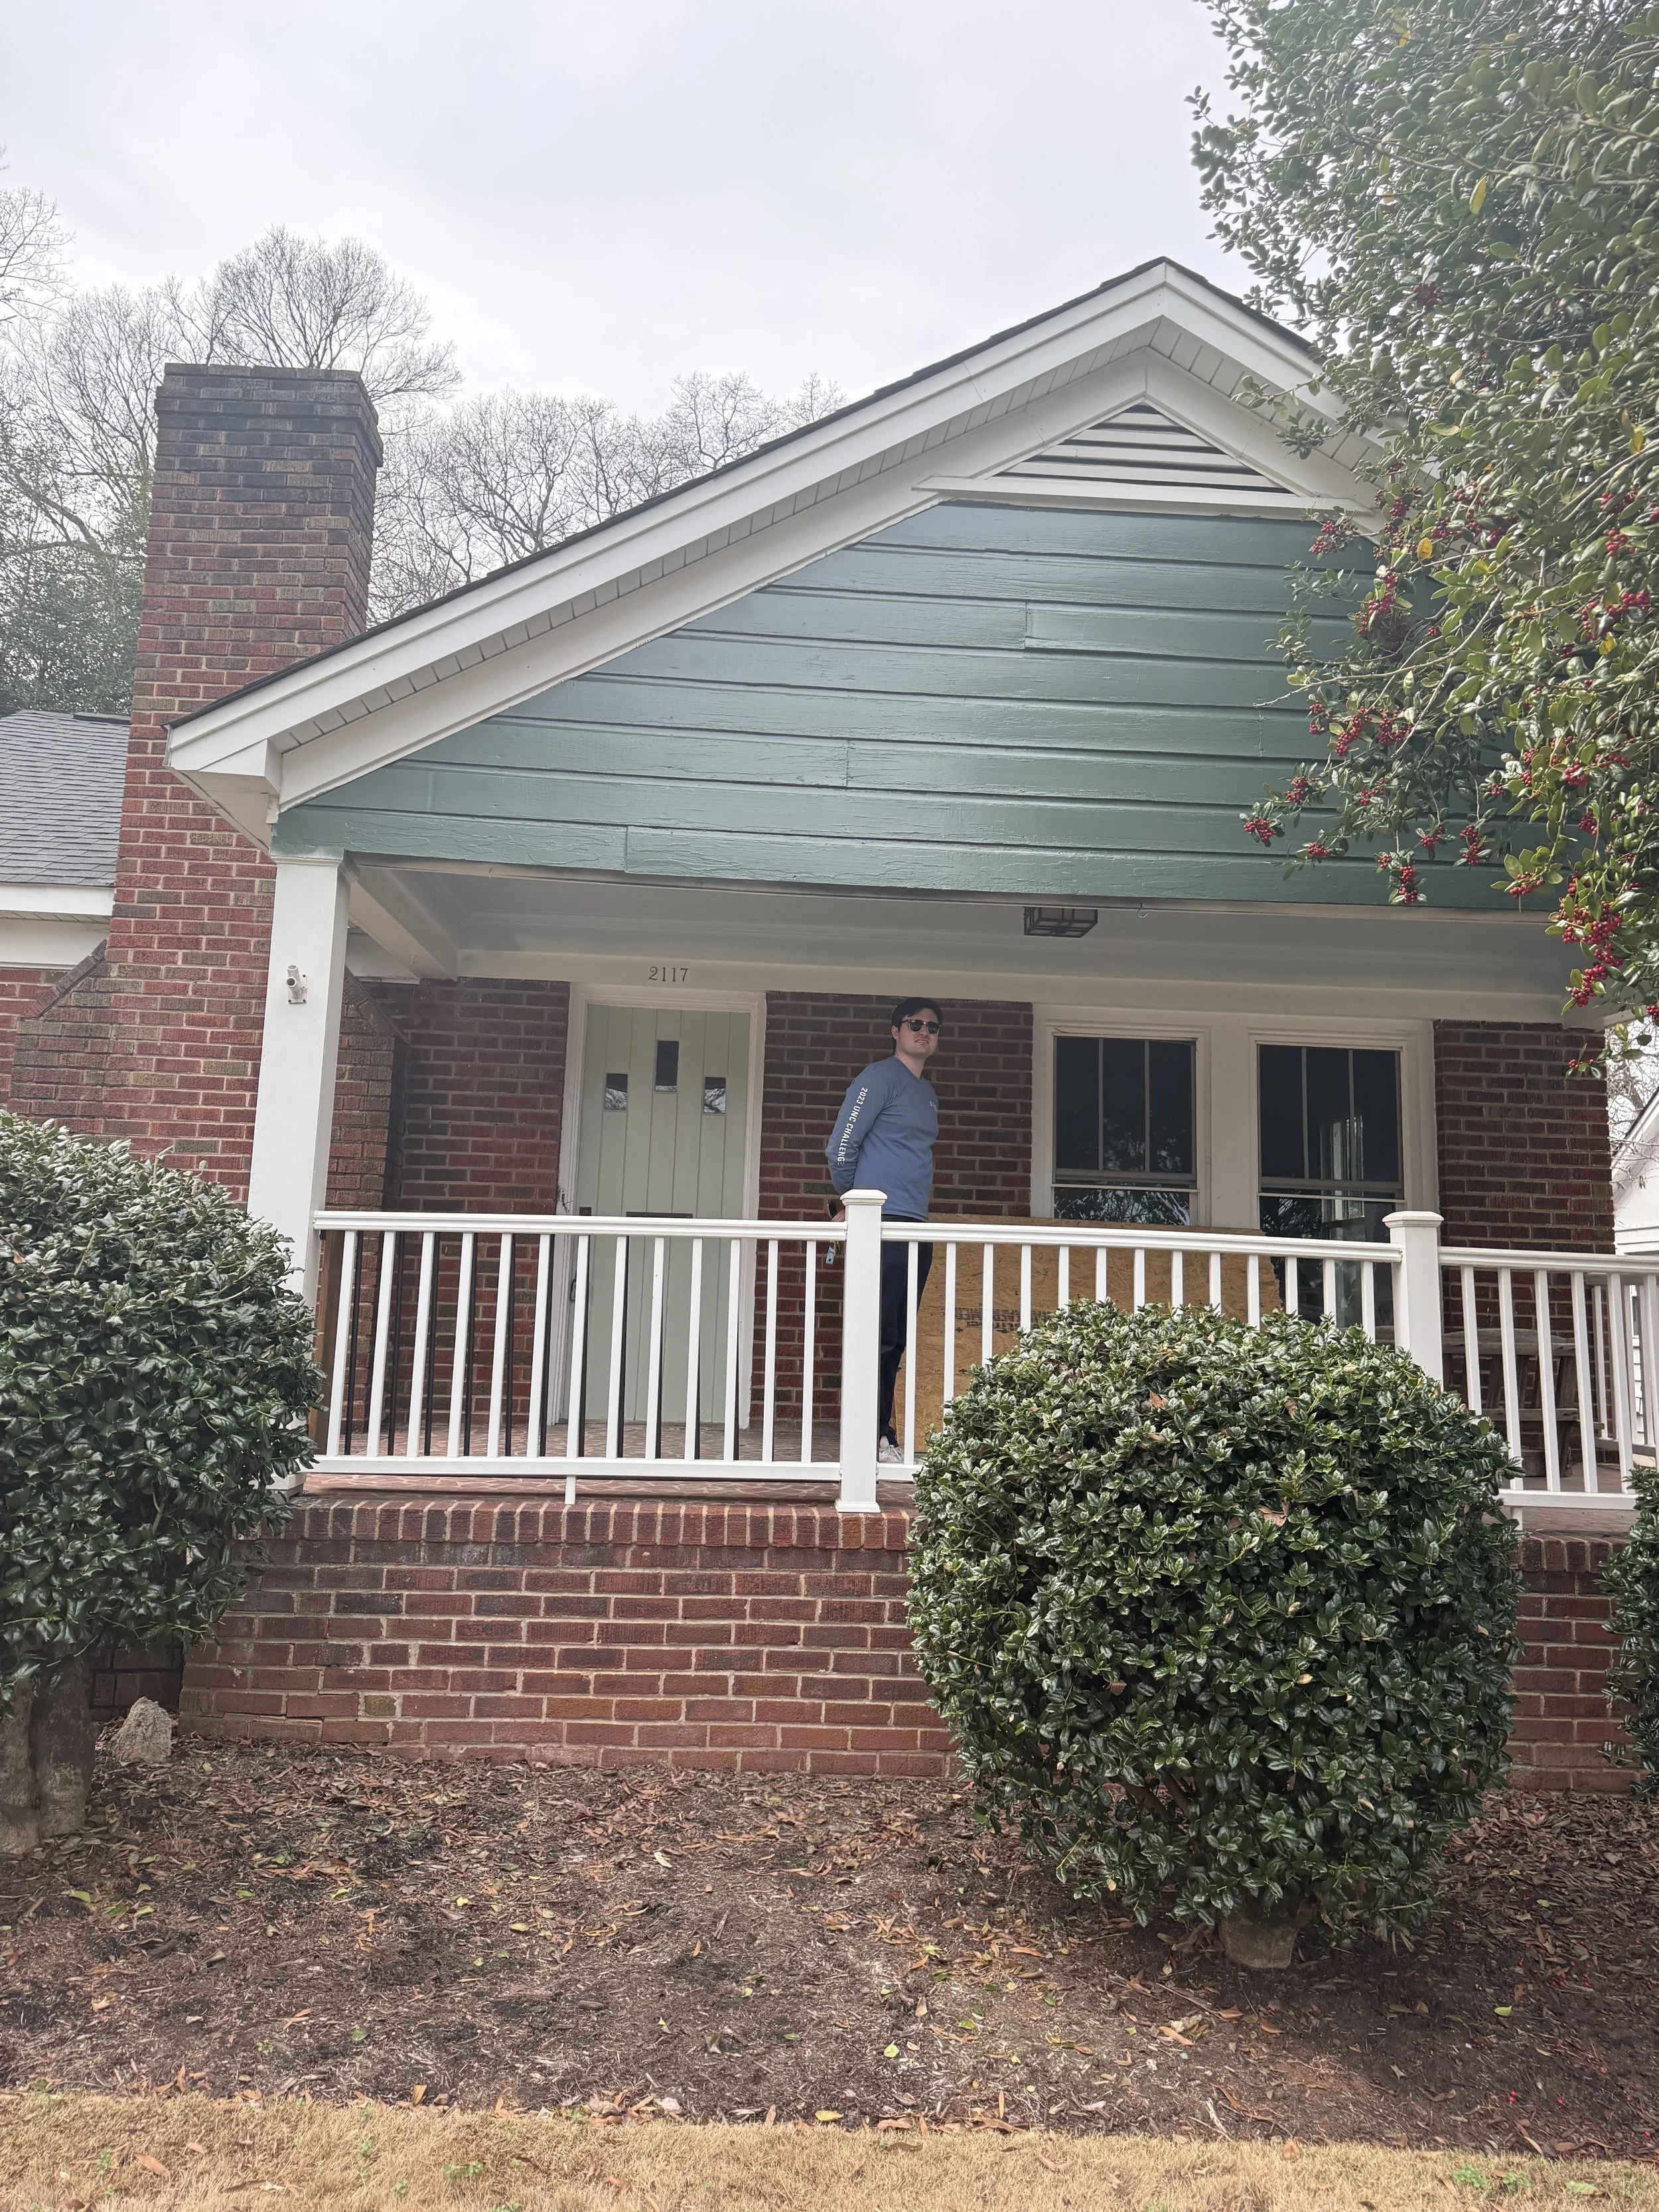
Caption: This was the hideous paint job completed in the “drive-by painting.” The painters did not confirm they would be painting, completed zero prep, sprayed an unapproved color, and bounced.
The Ukie Painting team was then hired to save the day and the facade of this bungalow.
For the limewash, the Ukie team helped provide guidance on the color selection with Romabio limewash, as I wanted a soft white that did not read yellow. When picking exterior paint colors, it’s important to consider the color of the roof, especially if you’re not planning on replacing it anytime soon. Since we wanted to keep some warm tones in the porch floor and add copper lanterns around the door, we also wanted warmth in our selected color; however, the roof was a slate grey so consideration had to be made for a white that worked well with both cool tones and warm colors. We added even more warmth to the facade by picking a happy spring green for the front door.
The most ideal way to swatch any colors is on the surface on which you are painting. Before doing that, though, I wanted to ensure the combination of colors selected for the exterior all went together harmoniously. To do this, I painted extra bricks with limewash and two pieces of scrap wood with the potential paint colors for the siding and the front door. Once painting all these swatches, I labeled them with a permanent marker on the sides of the 2×4s that was not visible, and then I could move the pieces around to find the right combination of whites and greens for my porch. Putting these “sample wood swatches” in the sun and the shade changed how the color appeared significantly, with shade revealing more undertones in the whites. Laying a sample of copper to represent the lantern sconces also adjusted how the color appeared.
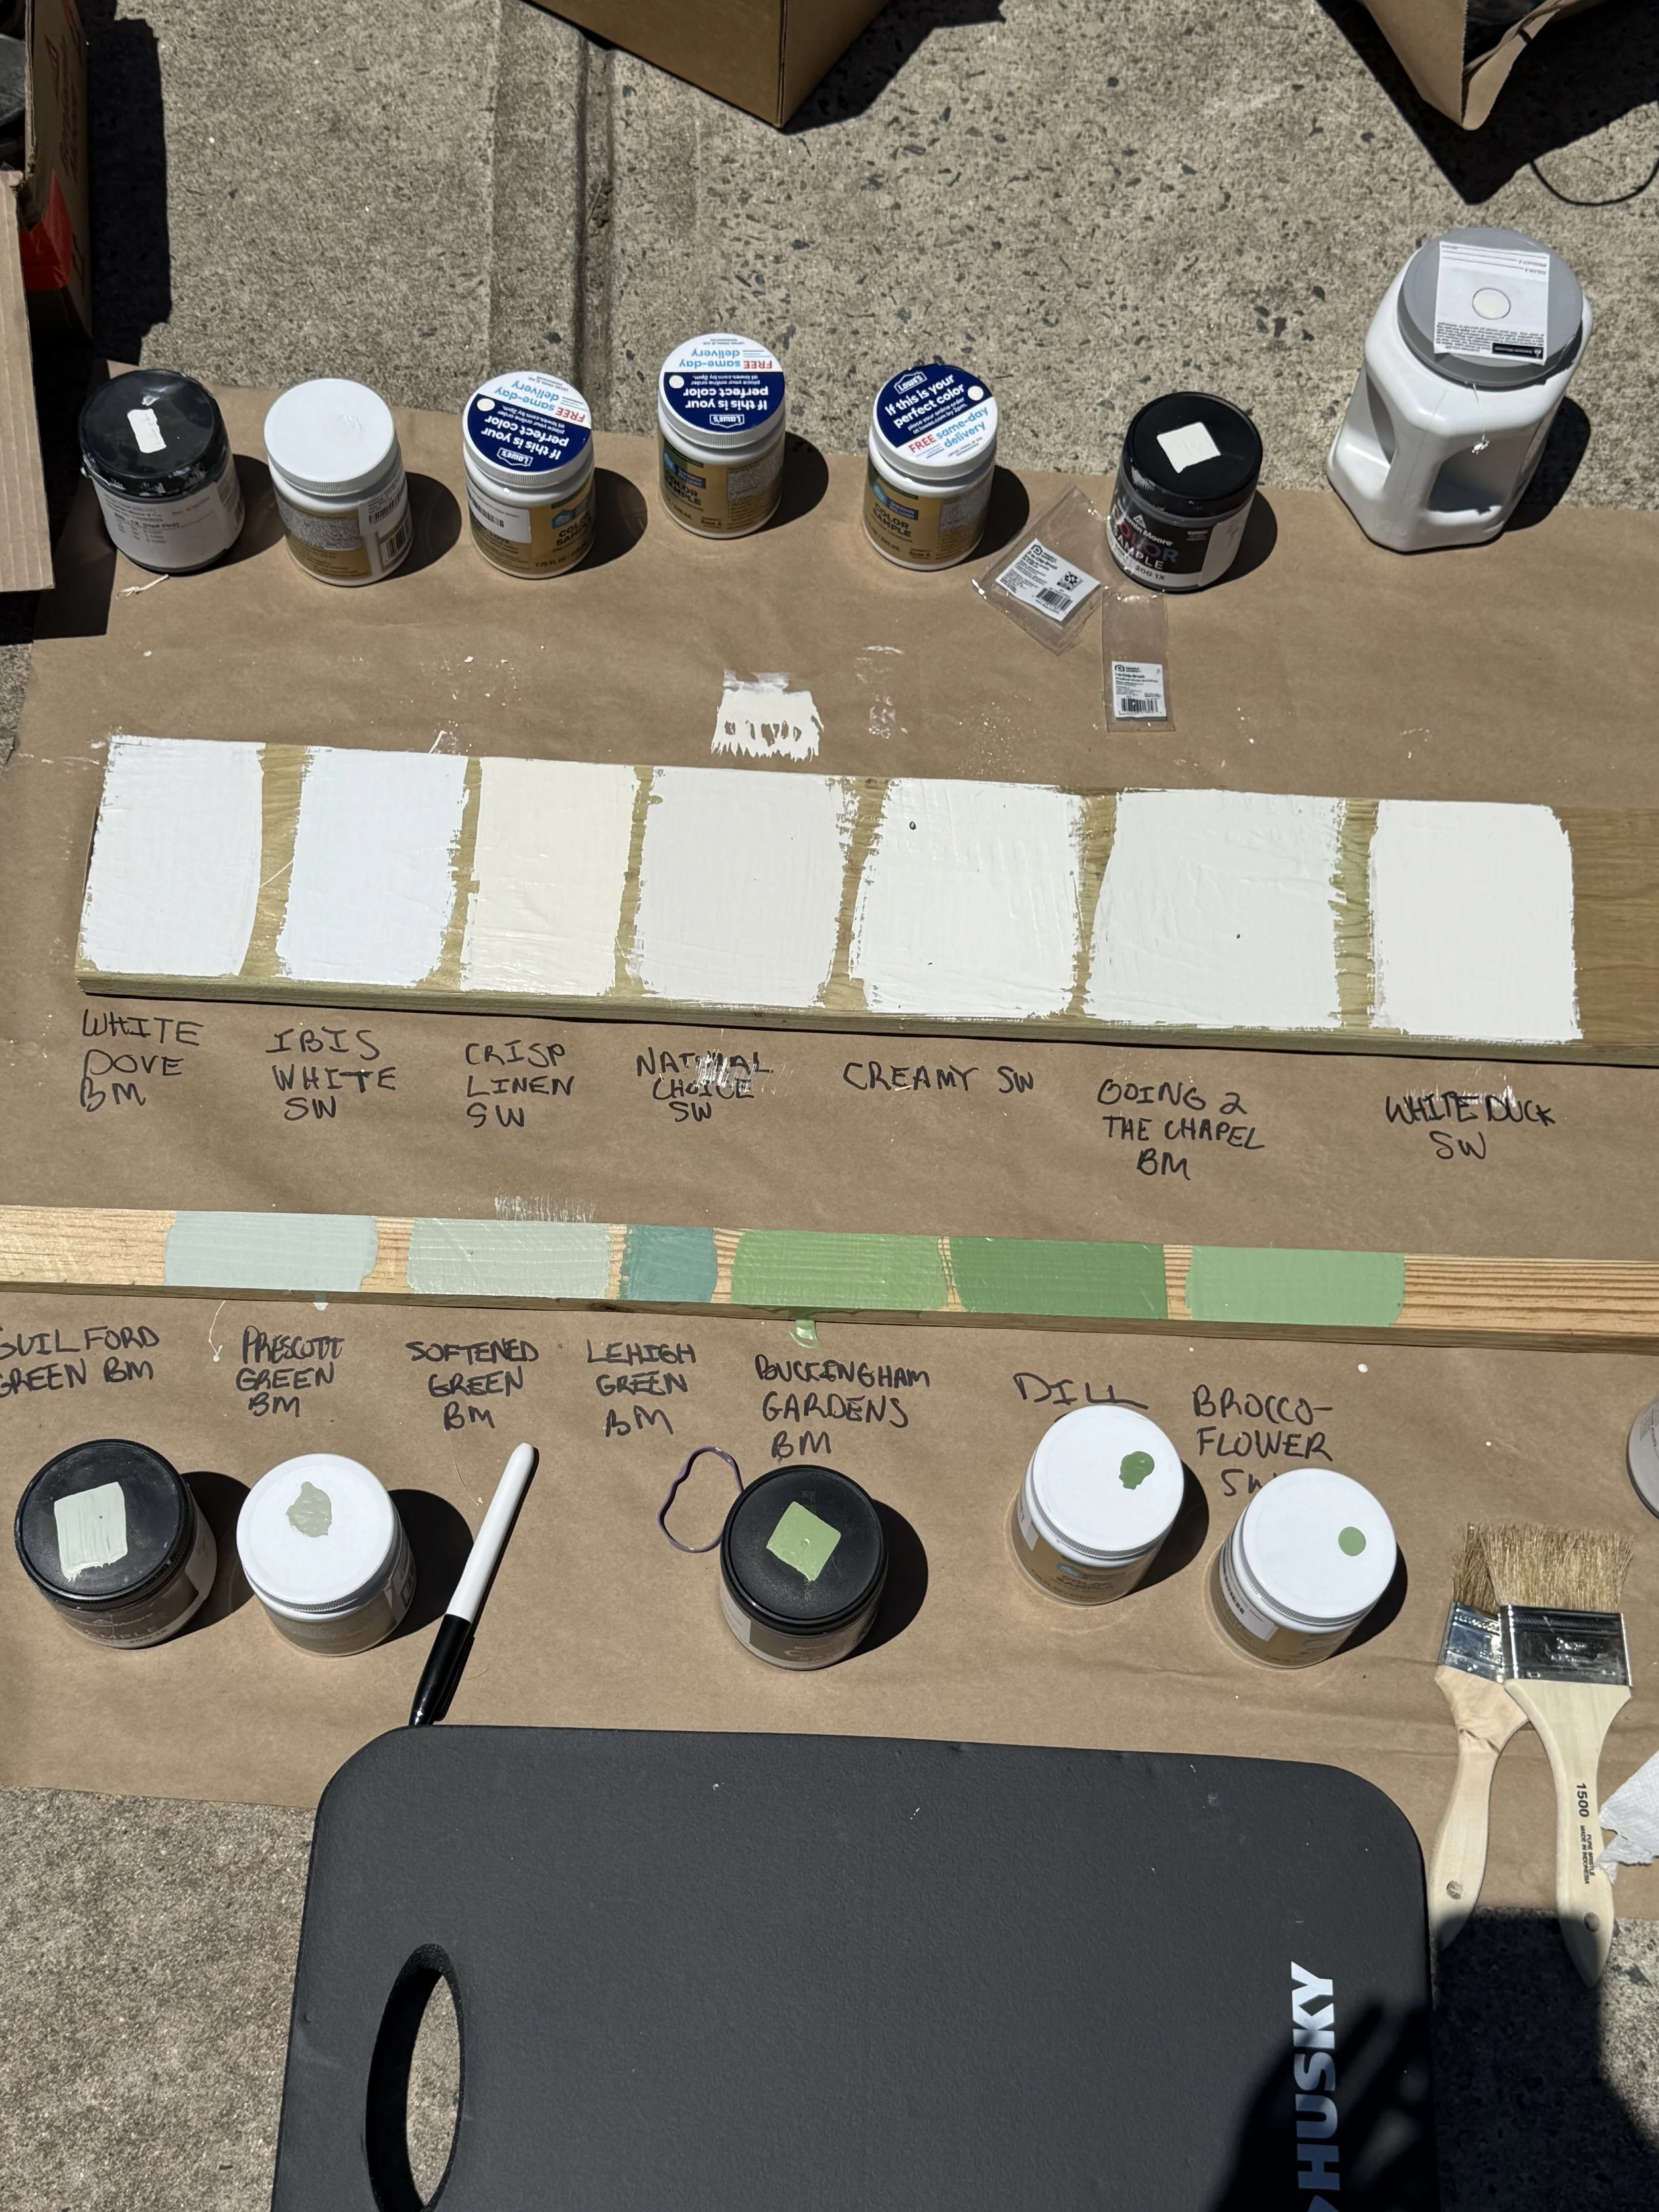
Caption: My paint swatching station on the driveway. I took the labels from the brown paper and transposed them onto the wood itself
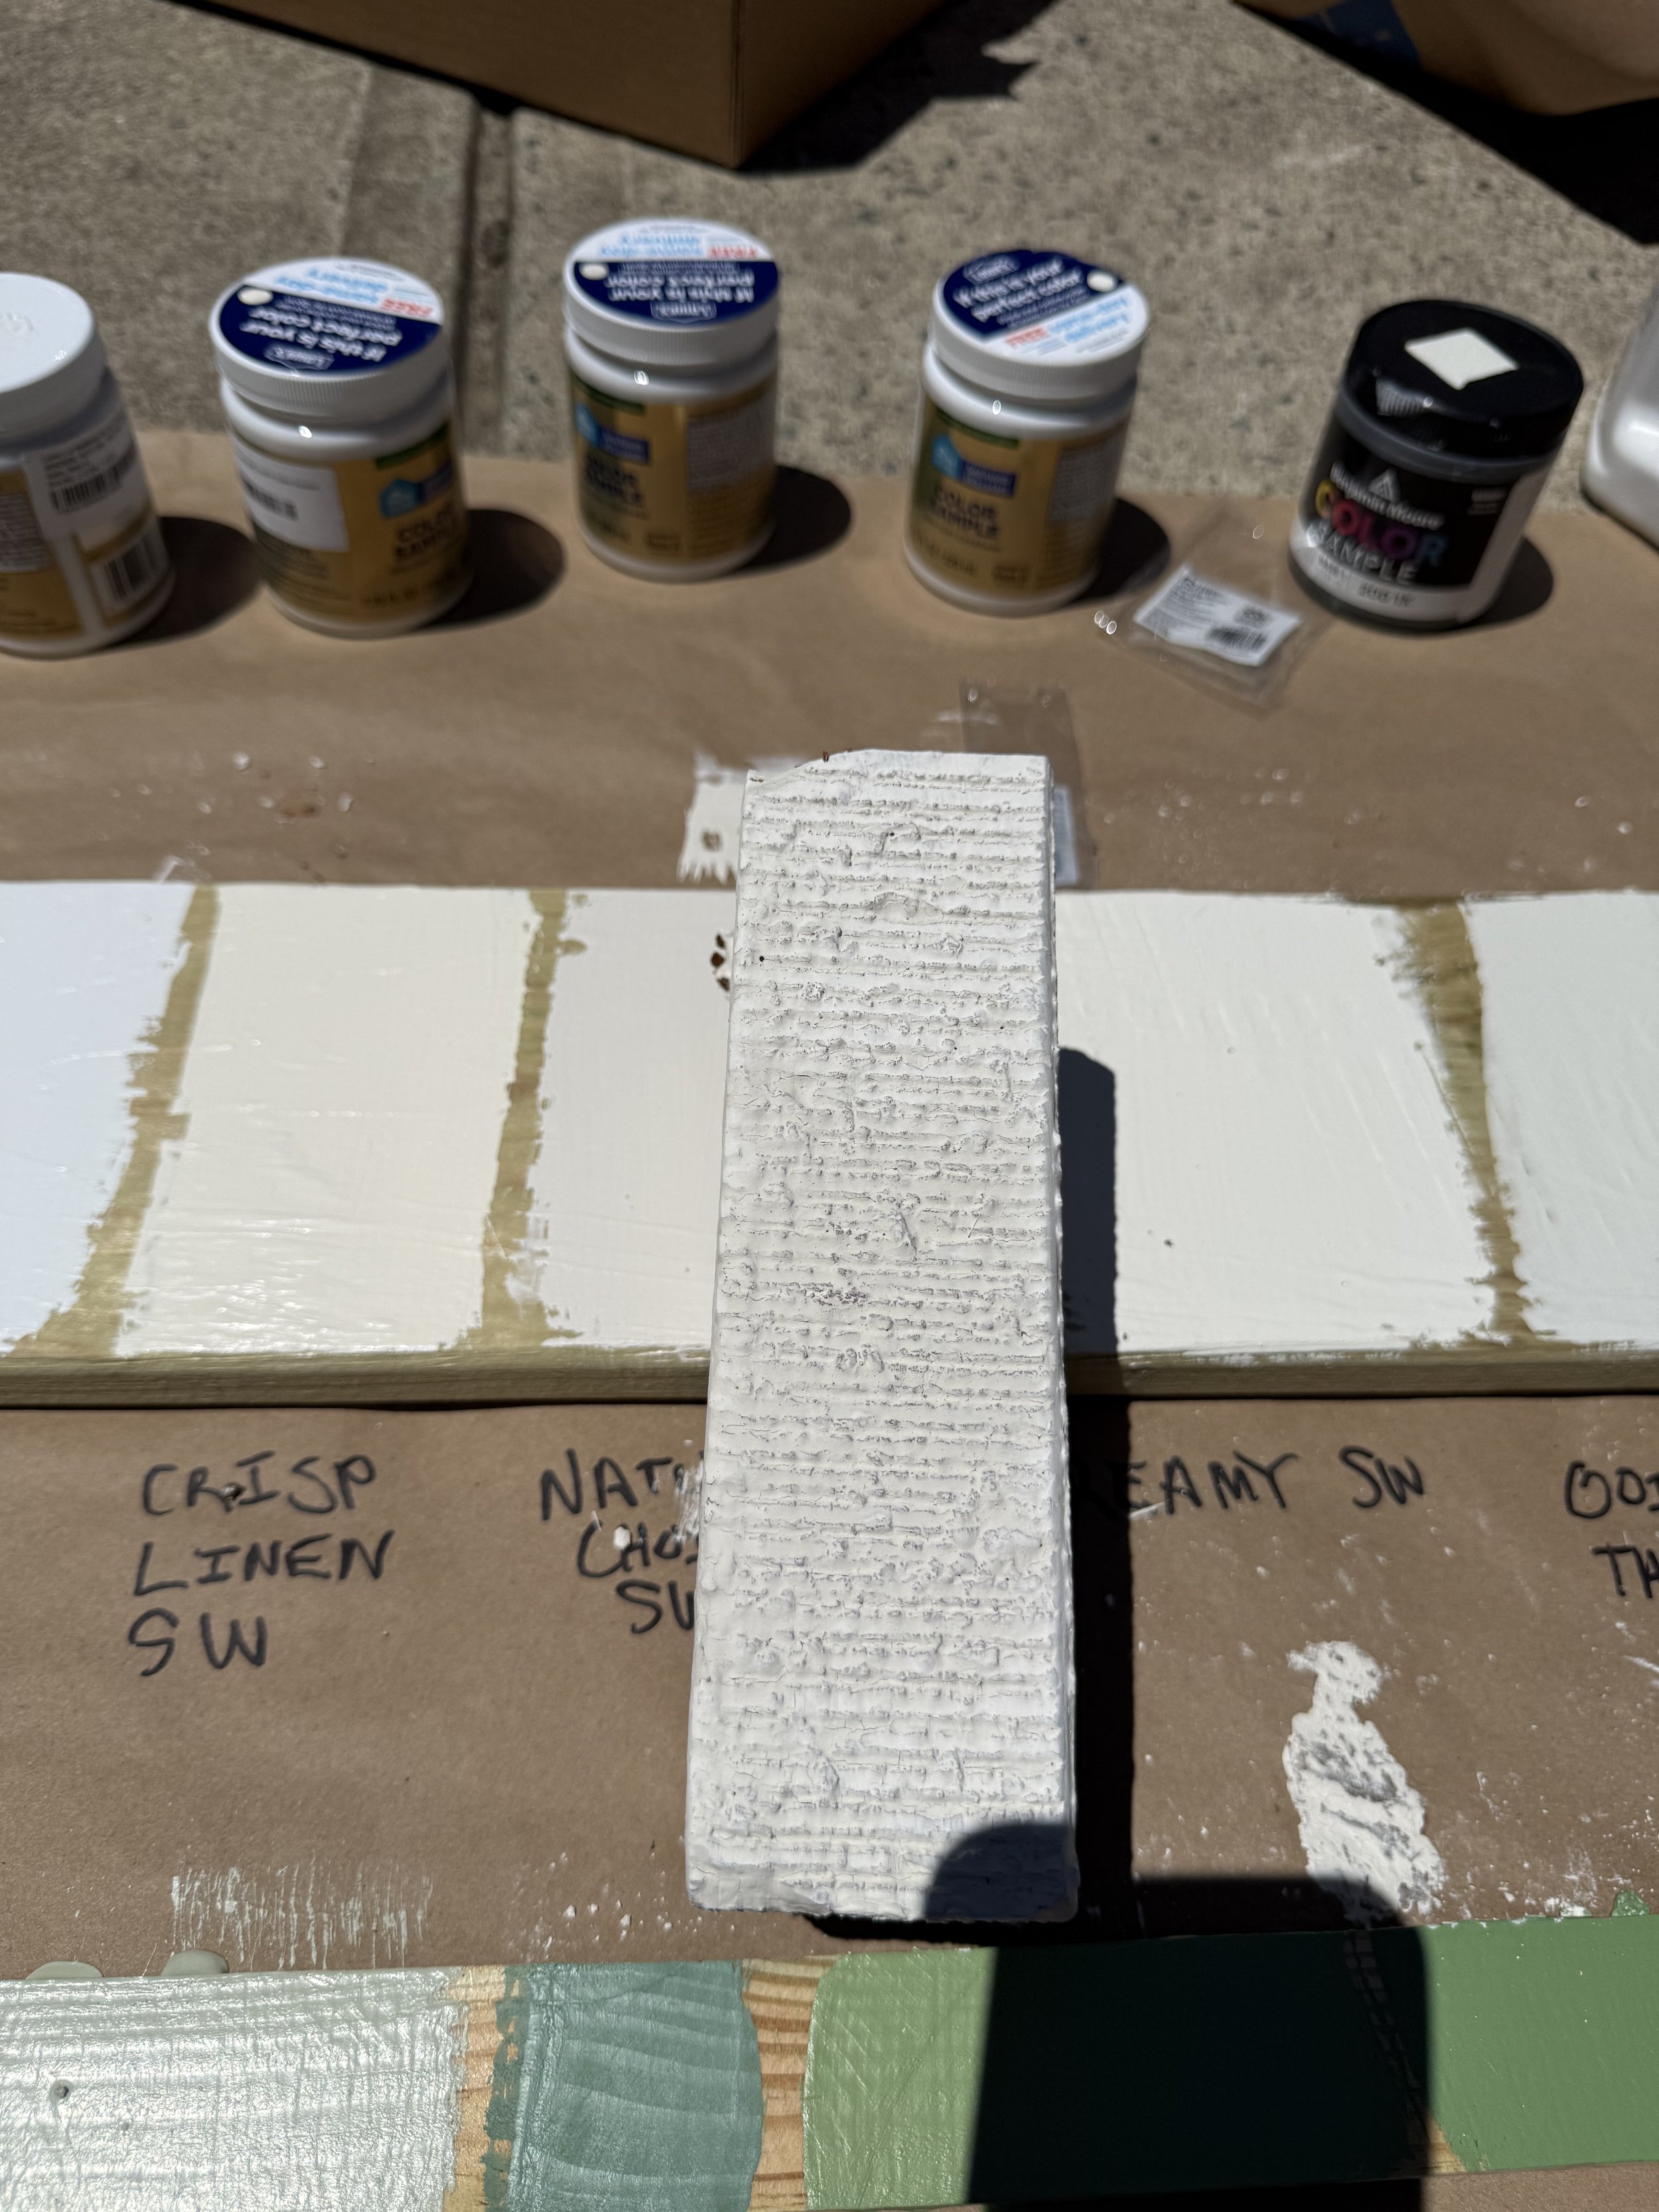
Caption: I moved this limewashed spare brick around these white paint swatches. I also moved the smaller piece of wood with the door paint swatches around to find the right combination of colors. The goal was to narrow down swatching on the door and house itself to only two colors each.
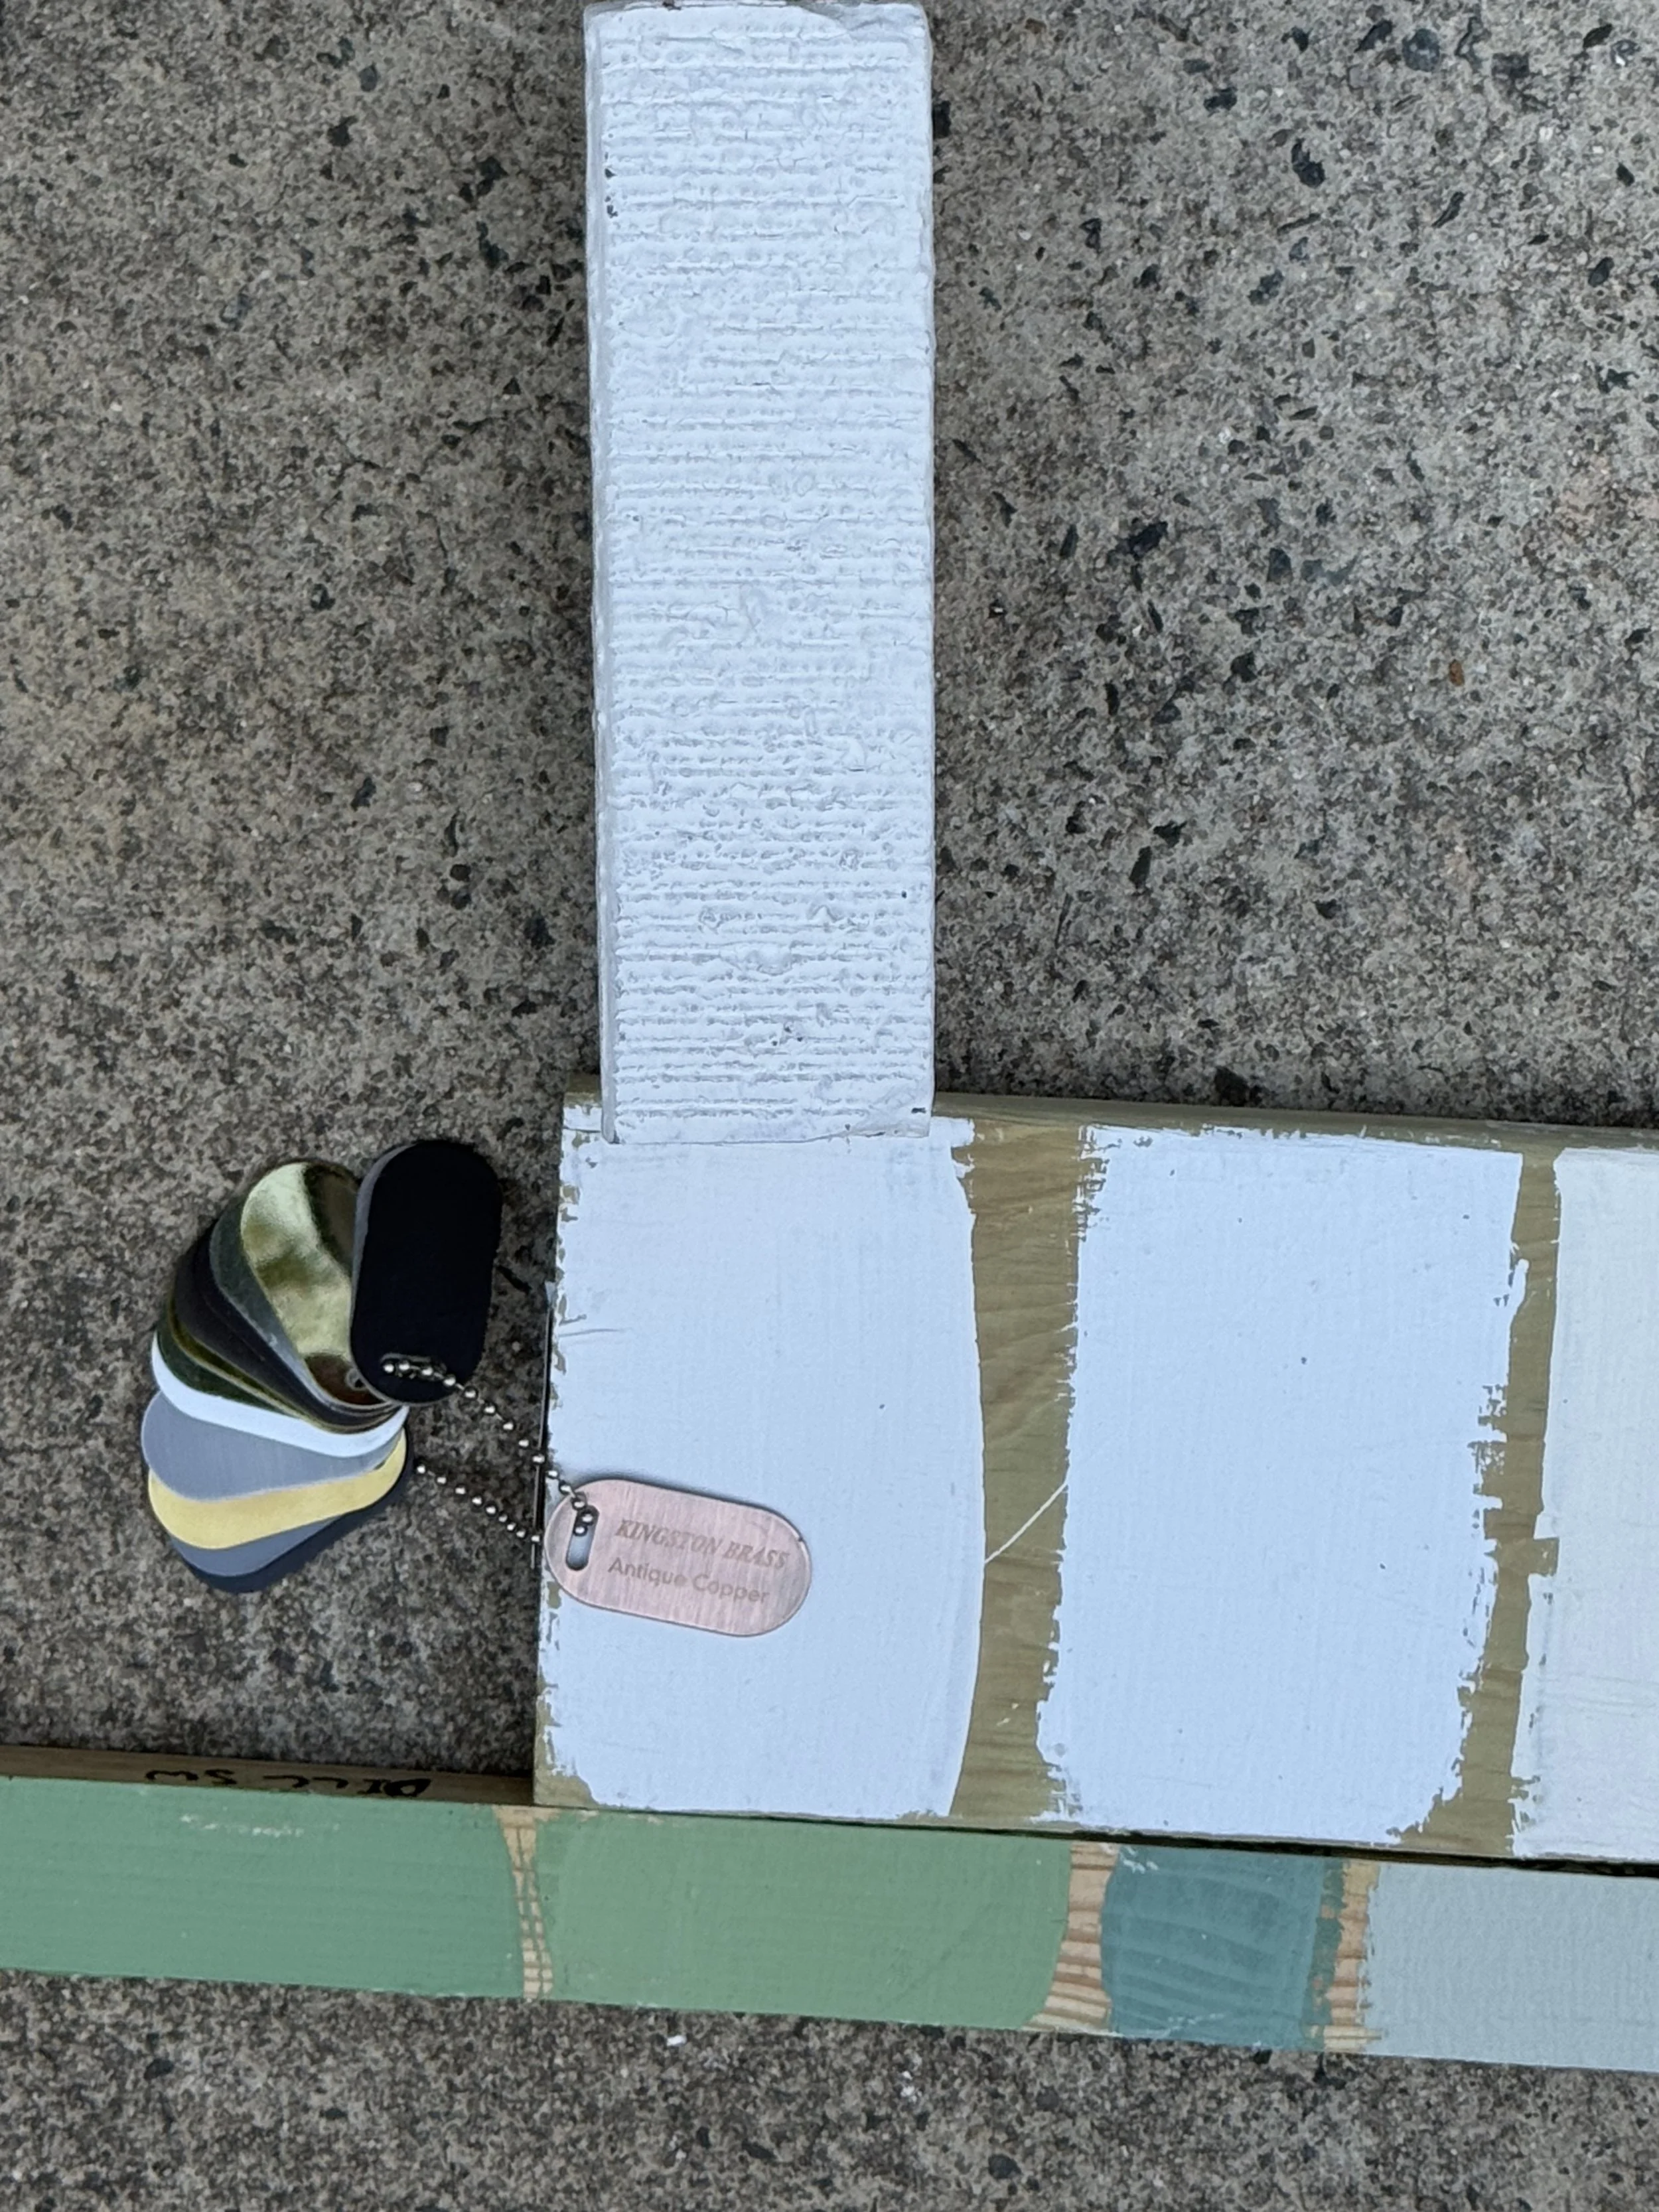
Caption: I used my Kingston Brass swatch in copper to represent our copper lantern sconces while playing around with the shades of white and green.
Once I had a couple of colors nailed down, I took these pieces of wood to the house and also swatched on the doors and trim.
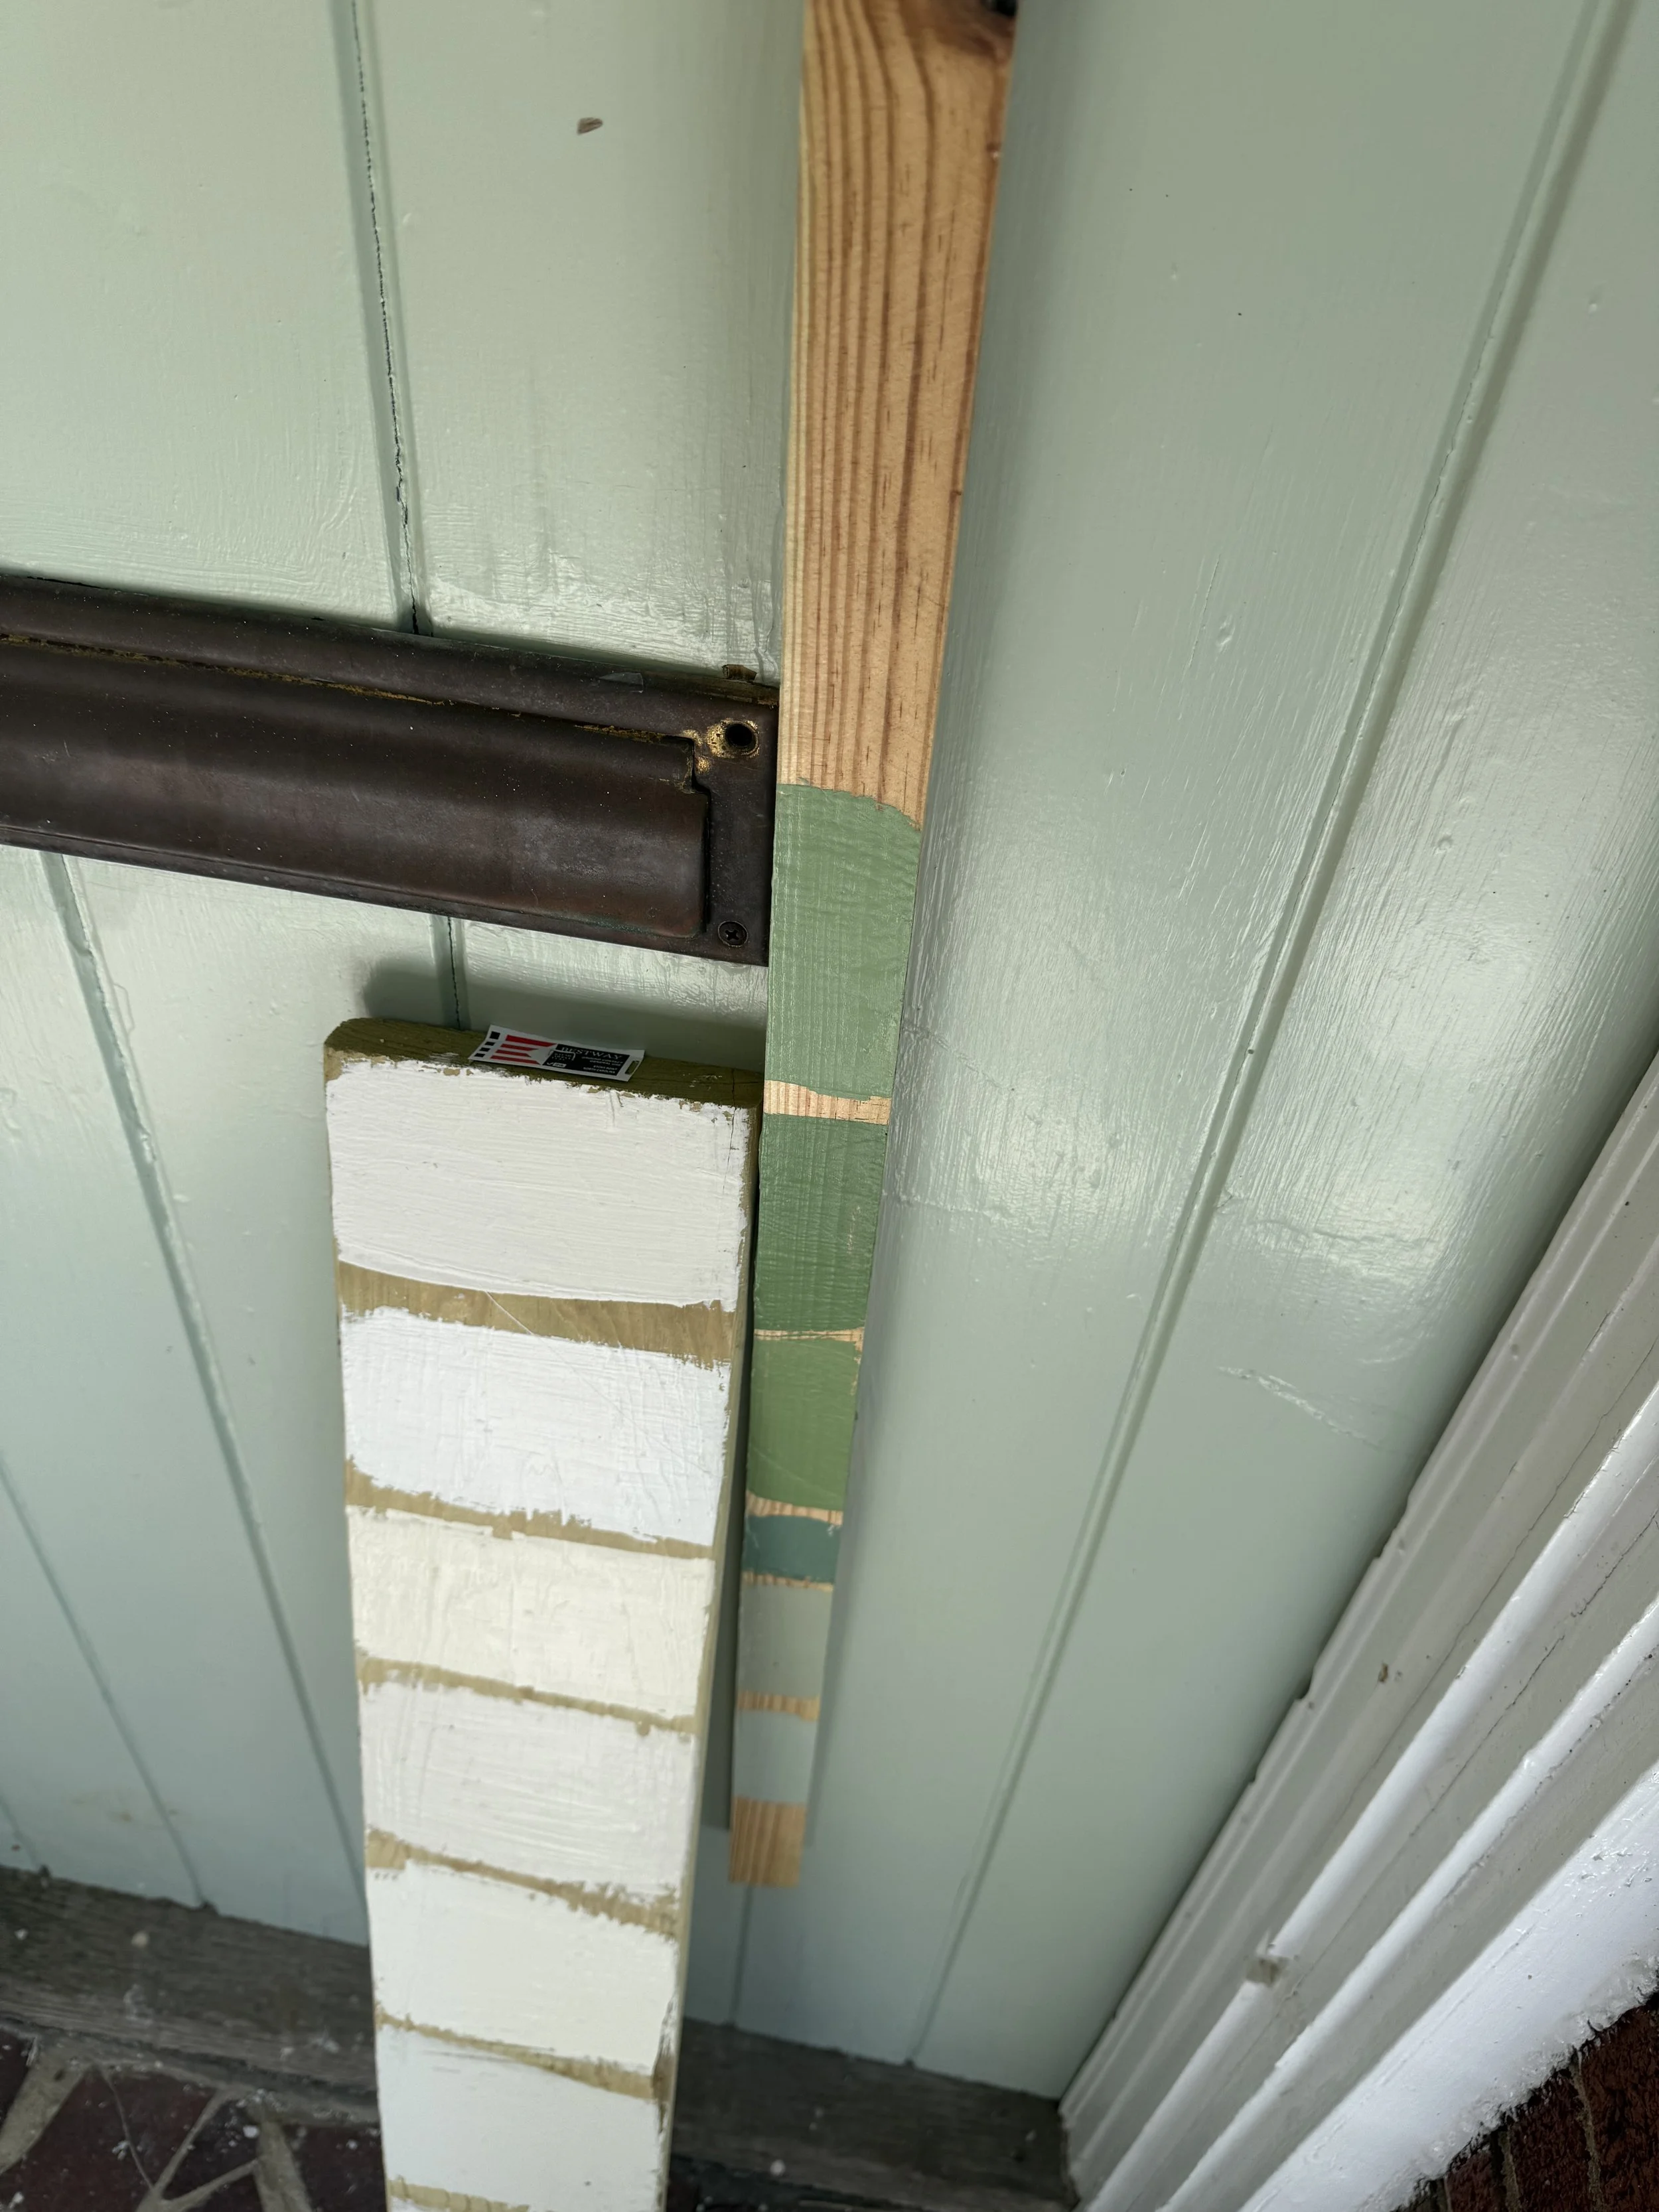
Caption: Here I used my boards to look at door casement and door color before swatching on the door itself.
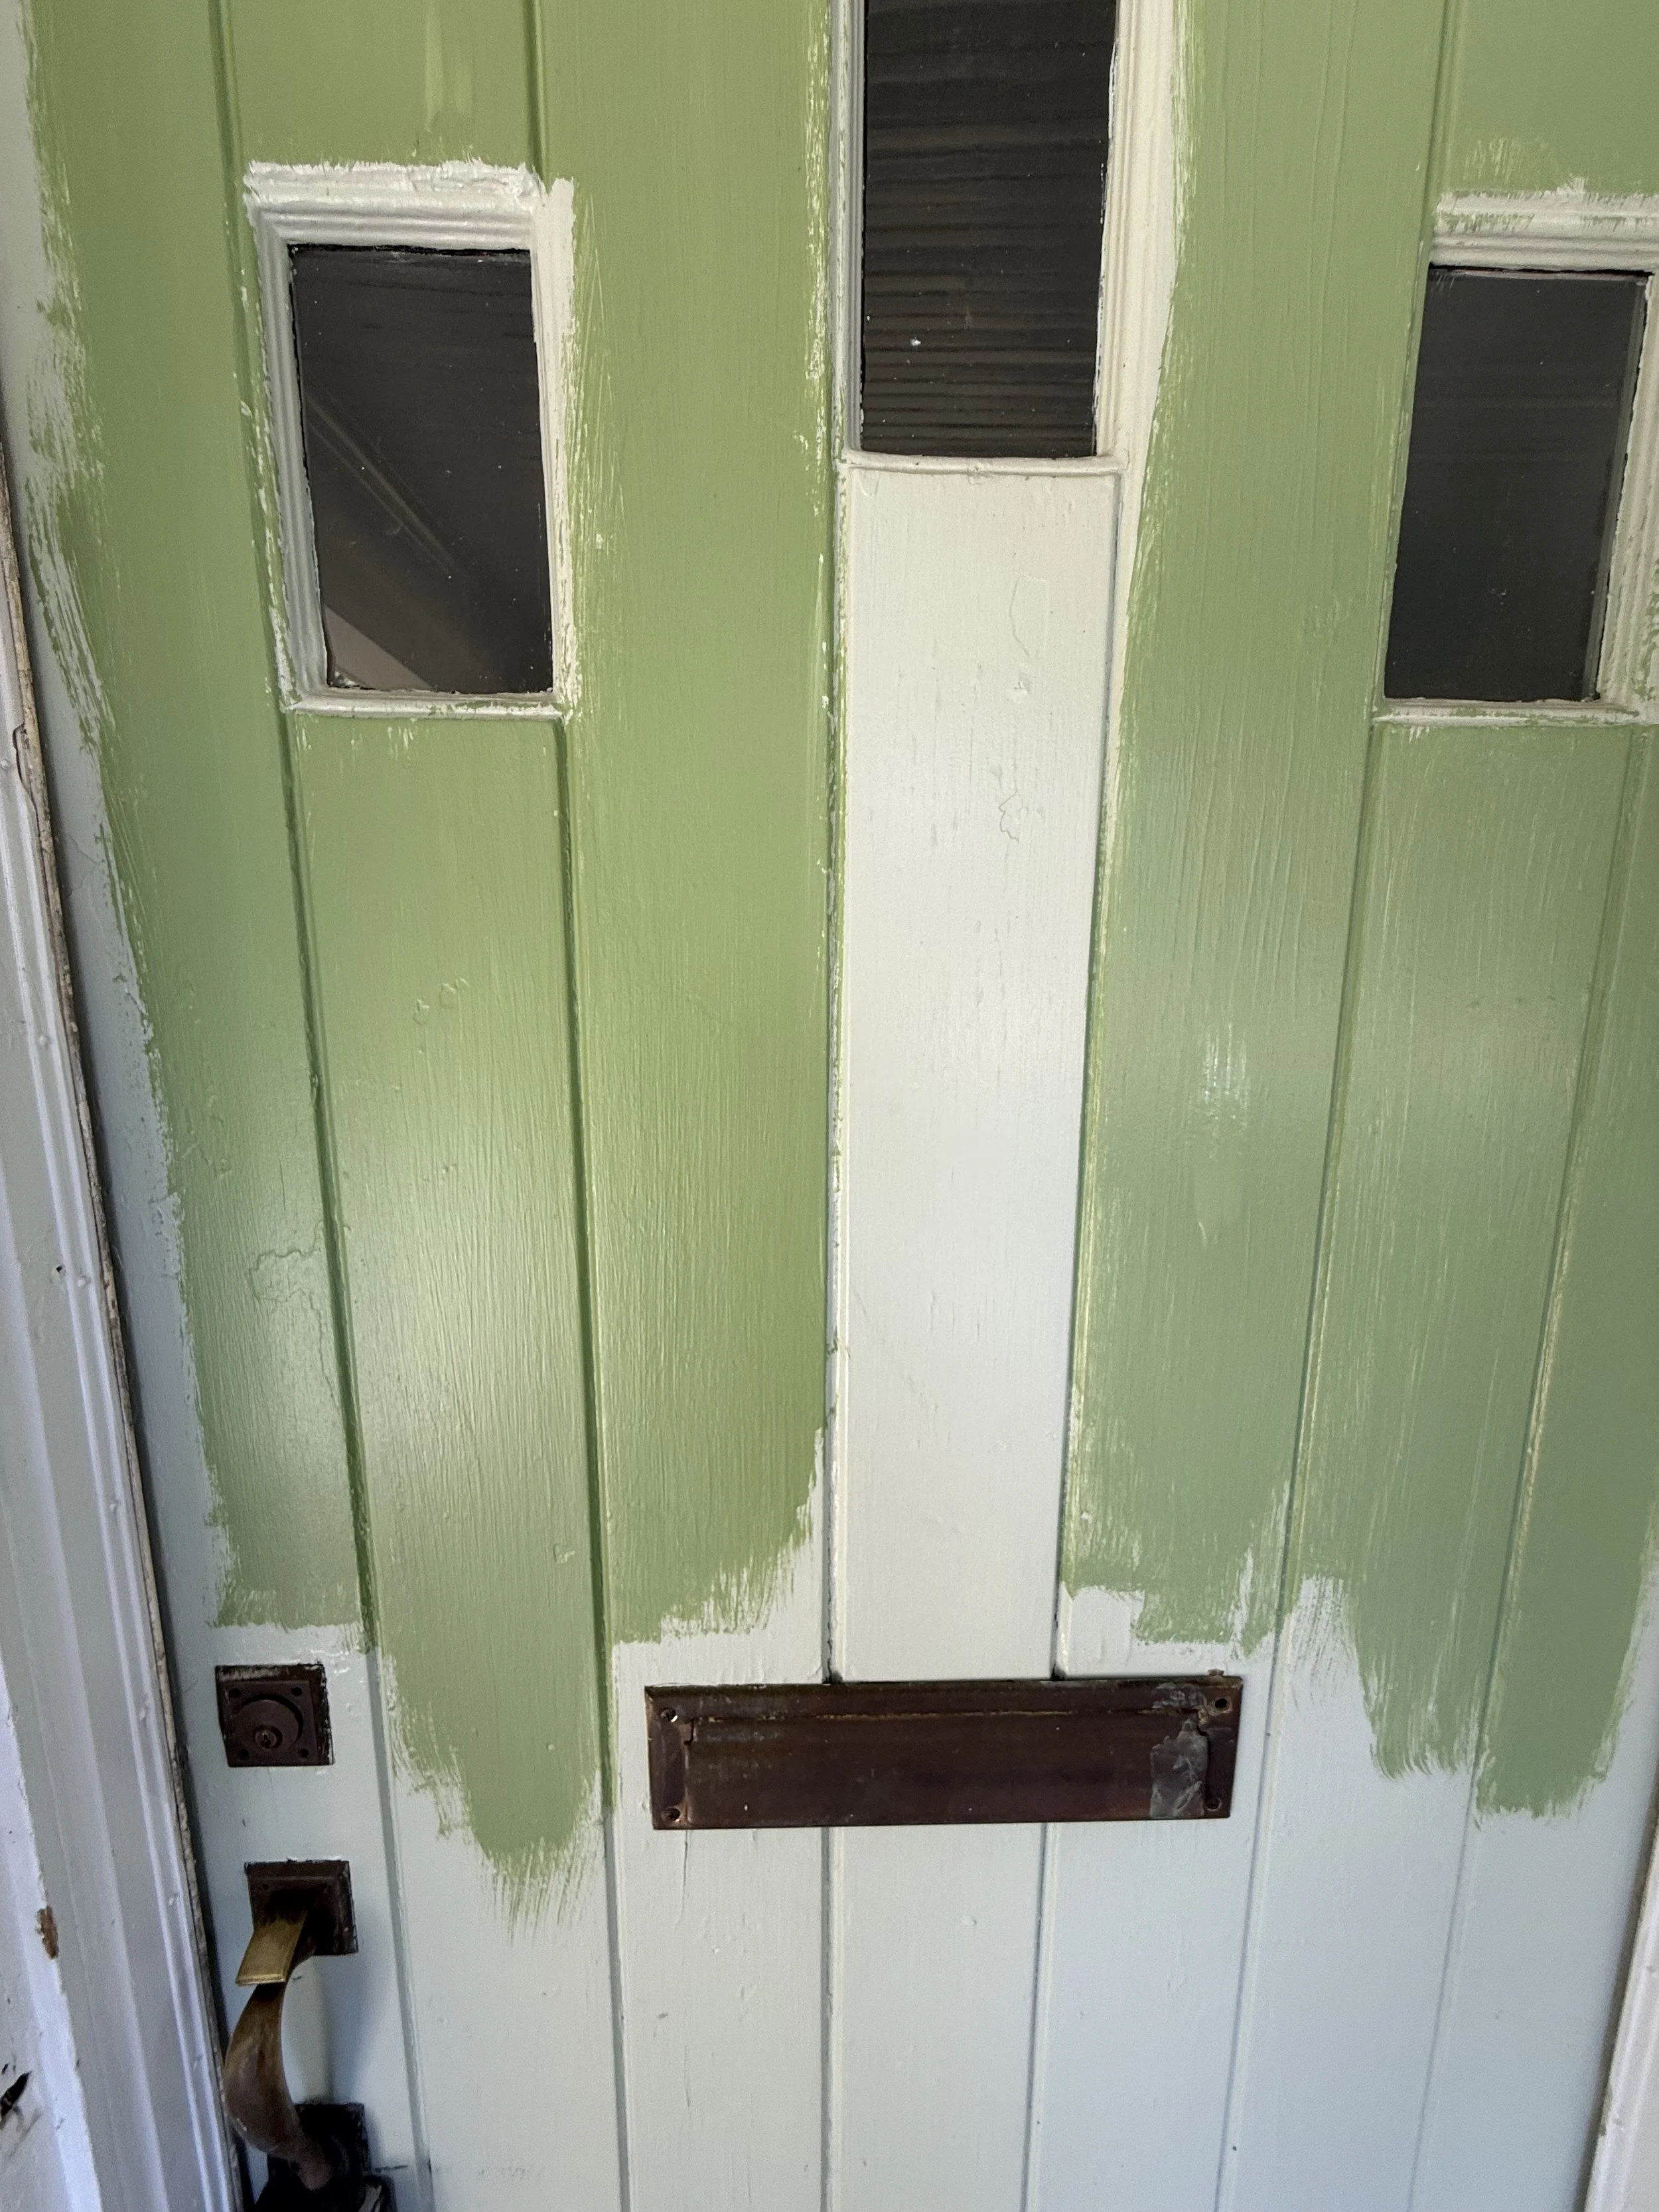
Caption: I narrowed the front door color down to two and put one on the left and the other on the right. I then looked at the door from the porch and the street. We selected the one on the left!
I also picked a sample of blue I thought represented the perfect “haint blue” southern porch ceiling.
At this point, I felt confident enough to put together the paint schedule for Ukie, and they guided me on the appropriate finishes. Normally semi gloss is recommended for exterior painting, but our front door had a lot of damage to it and was not in the best shape. For this reason, we chose semi gloss for the beadboard, the siding, and trim and for the front door we opted for a satin finish.
The week of exterior painting came quickly, and Ukie Painting confirmed our start times. My project manager, Andrii, had walked through a checklist to ensure we were all on the same page for the project. The team power washed the first day and then spent about another day of prep work filling holes, cracks, and other potential imperfections that would mess with the paint finish. Then came the lime washing. I wanted as opaque as possible a finish on the limewash to cover the sins of the mismatched brick from our addition, knowing that the limewashed brick is a living finish and will naturally weather over time. To achieve this, the crew did a lime to water mixture of two to one when formulating the limewash. Then, they wet the brick, sprayed it once with the formulation, and a few minutes later sprayed it again. It was the perfect finish!
I was even able to take some of the door numbers home to strip and clean, and I also spray painted the vent wells a copper color with Rustoleum prior to reinstalling.
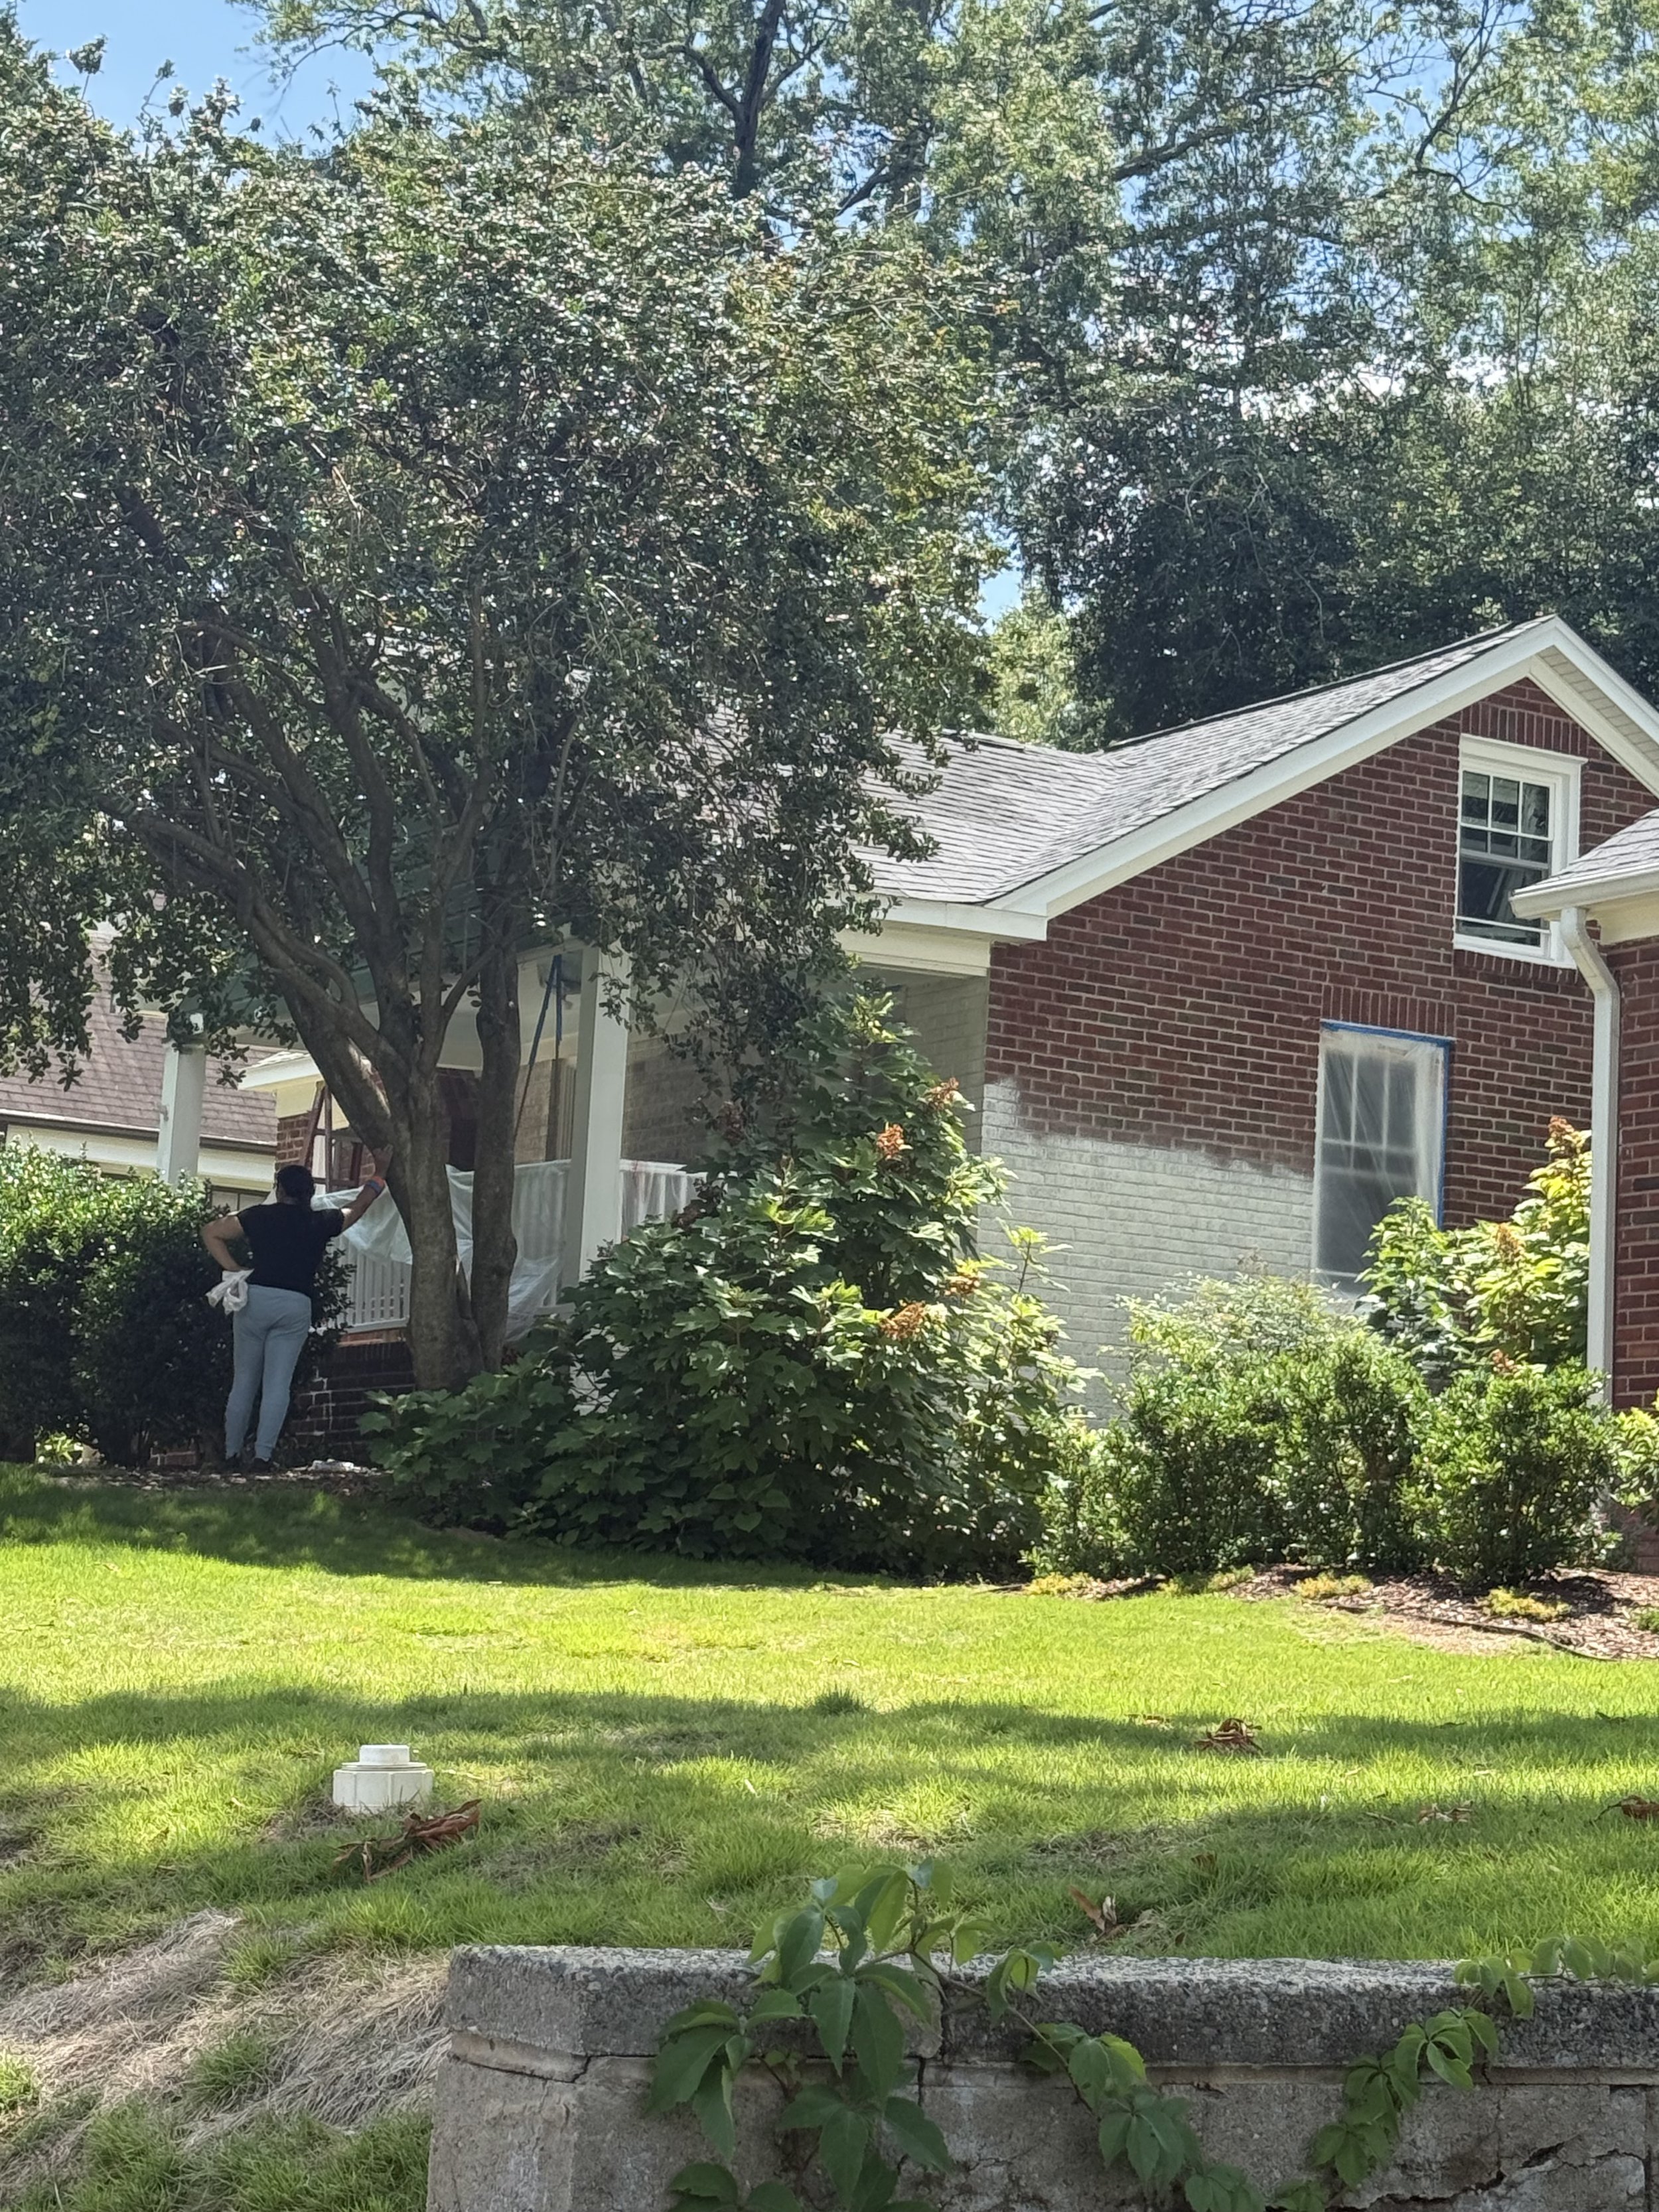
Caption: The crew began first with the limewash.
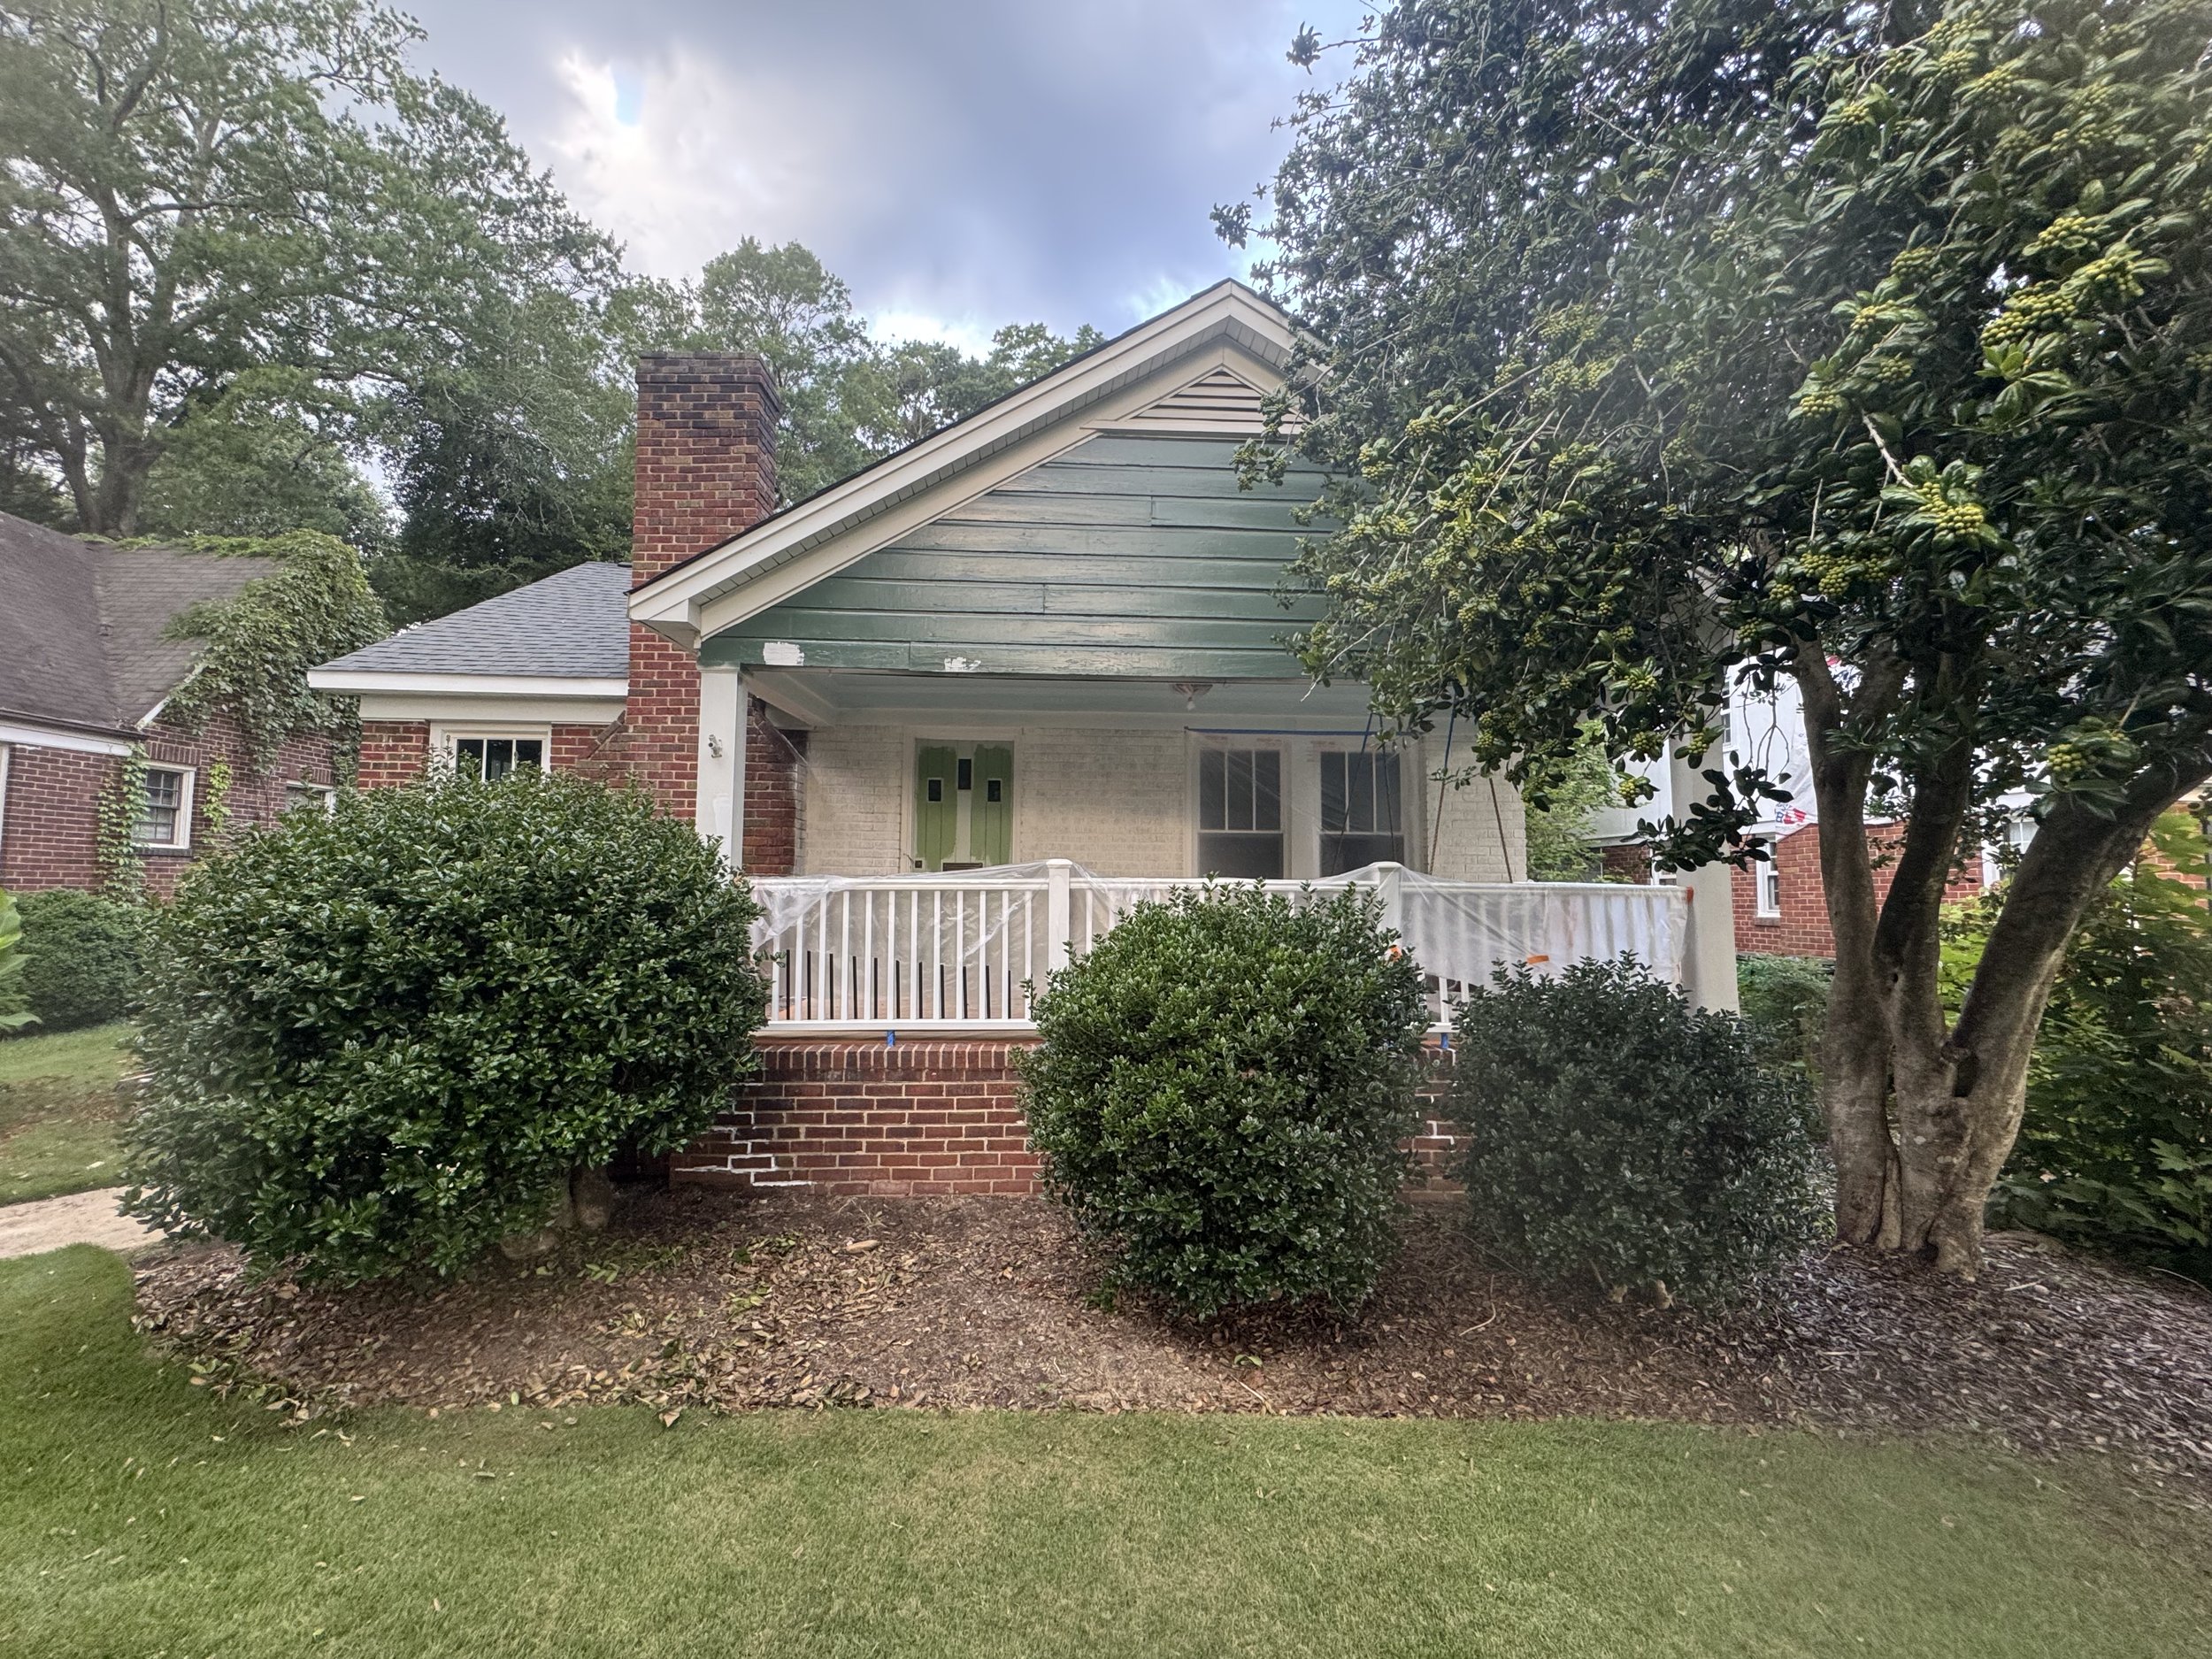
Caption: You can start to see the vision for the limewash and paint colors come to life.
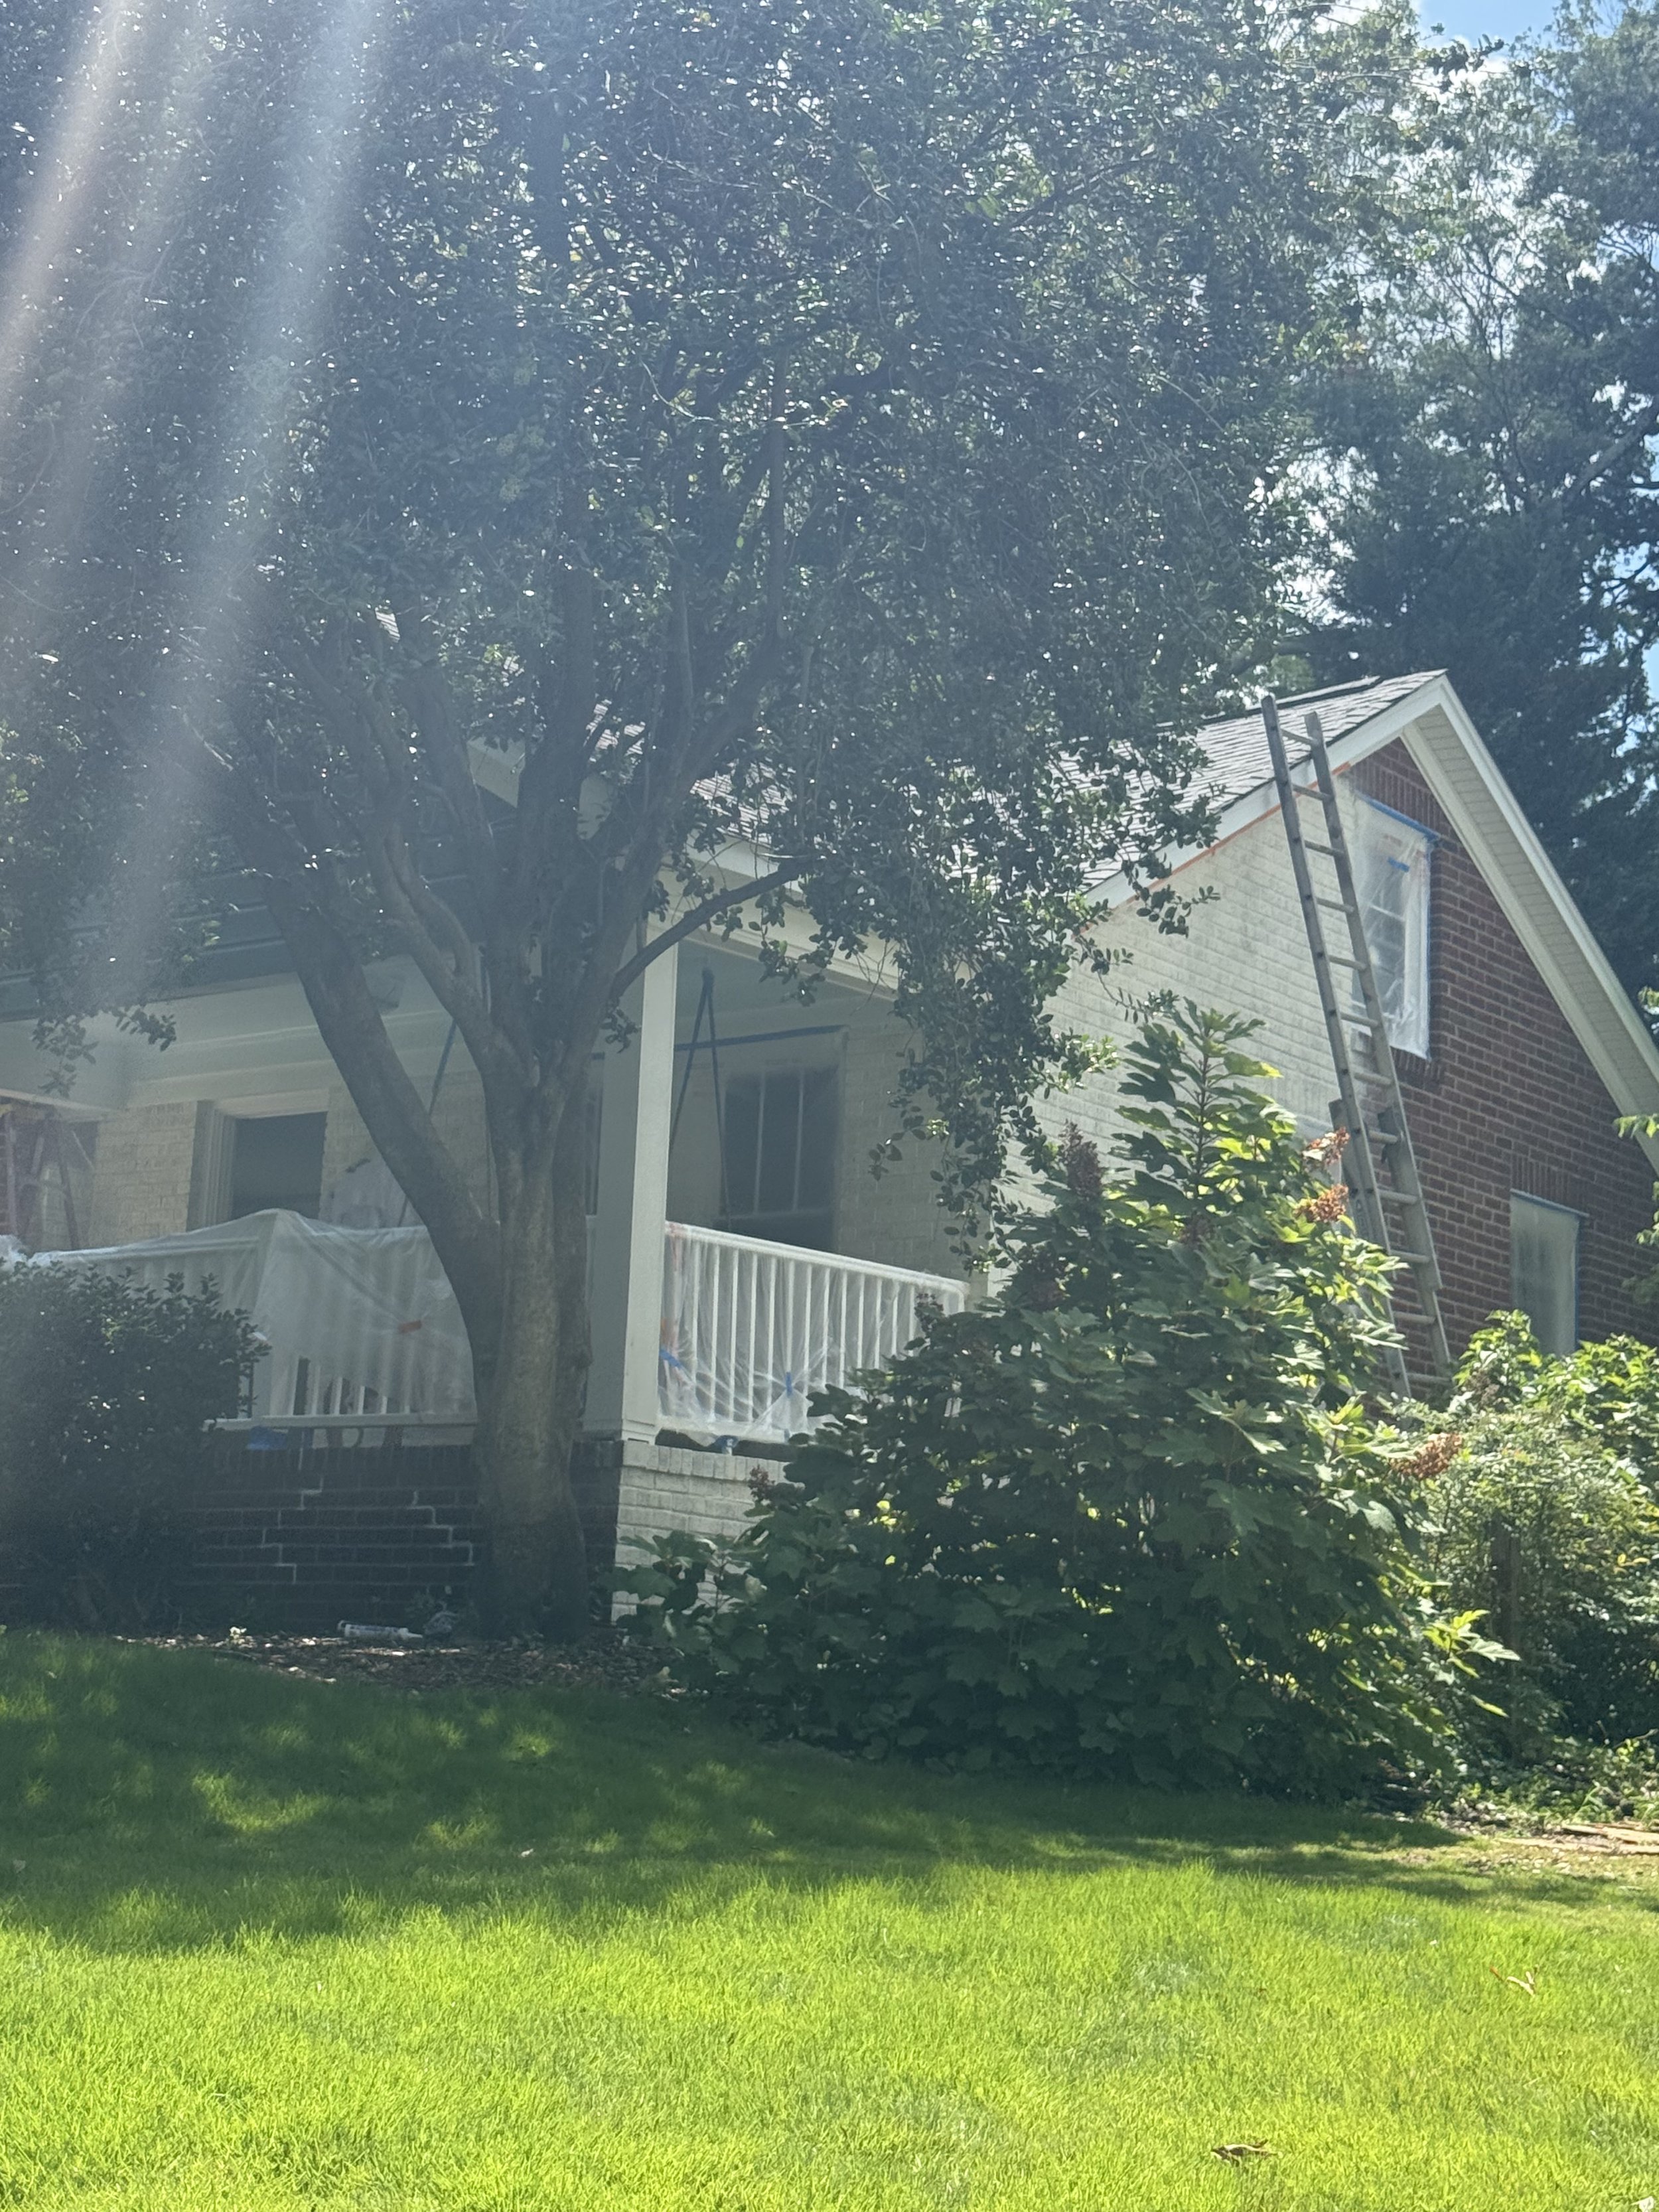
Caption: The crew began to make progress with the limewash.
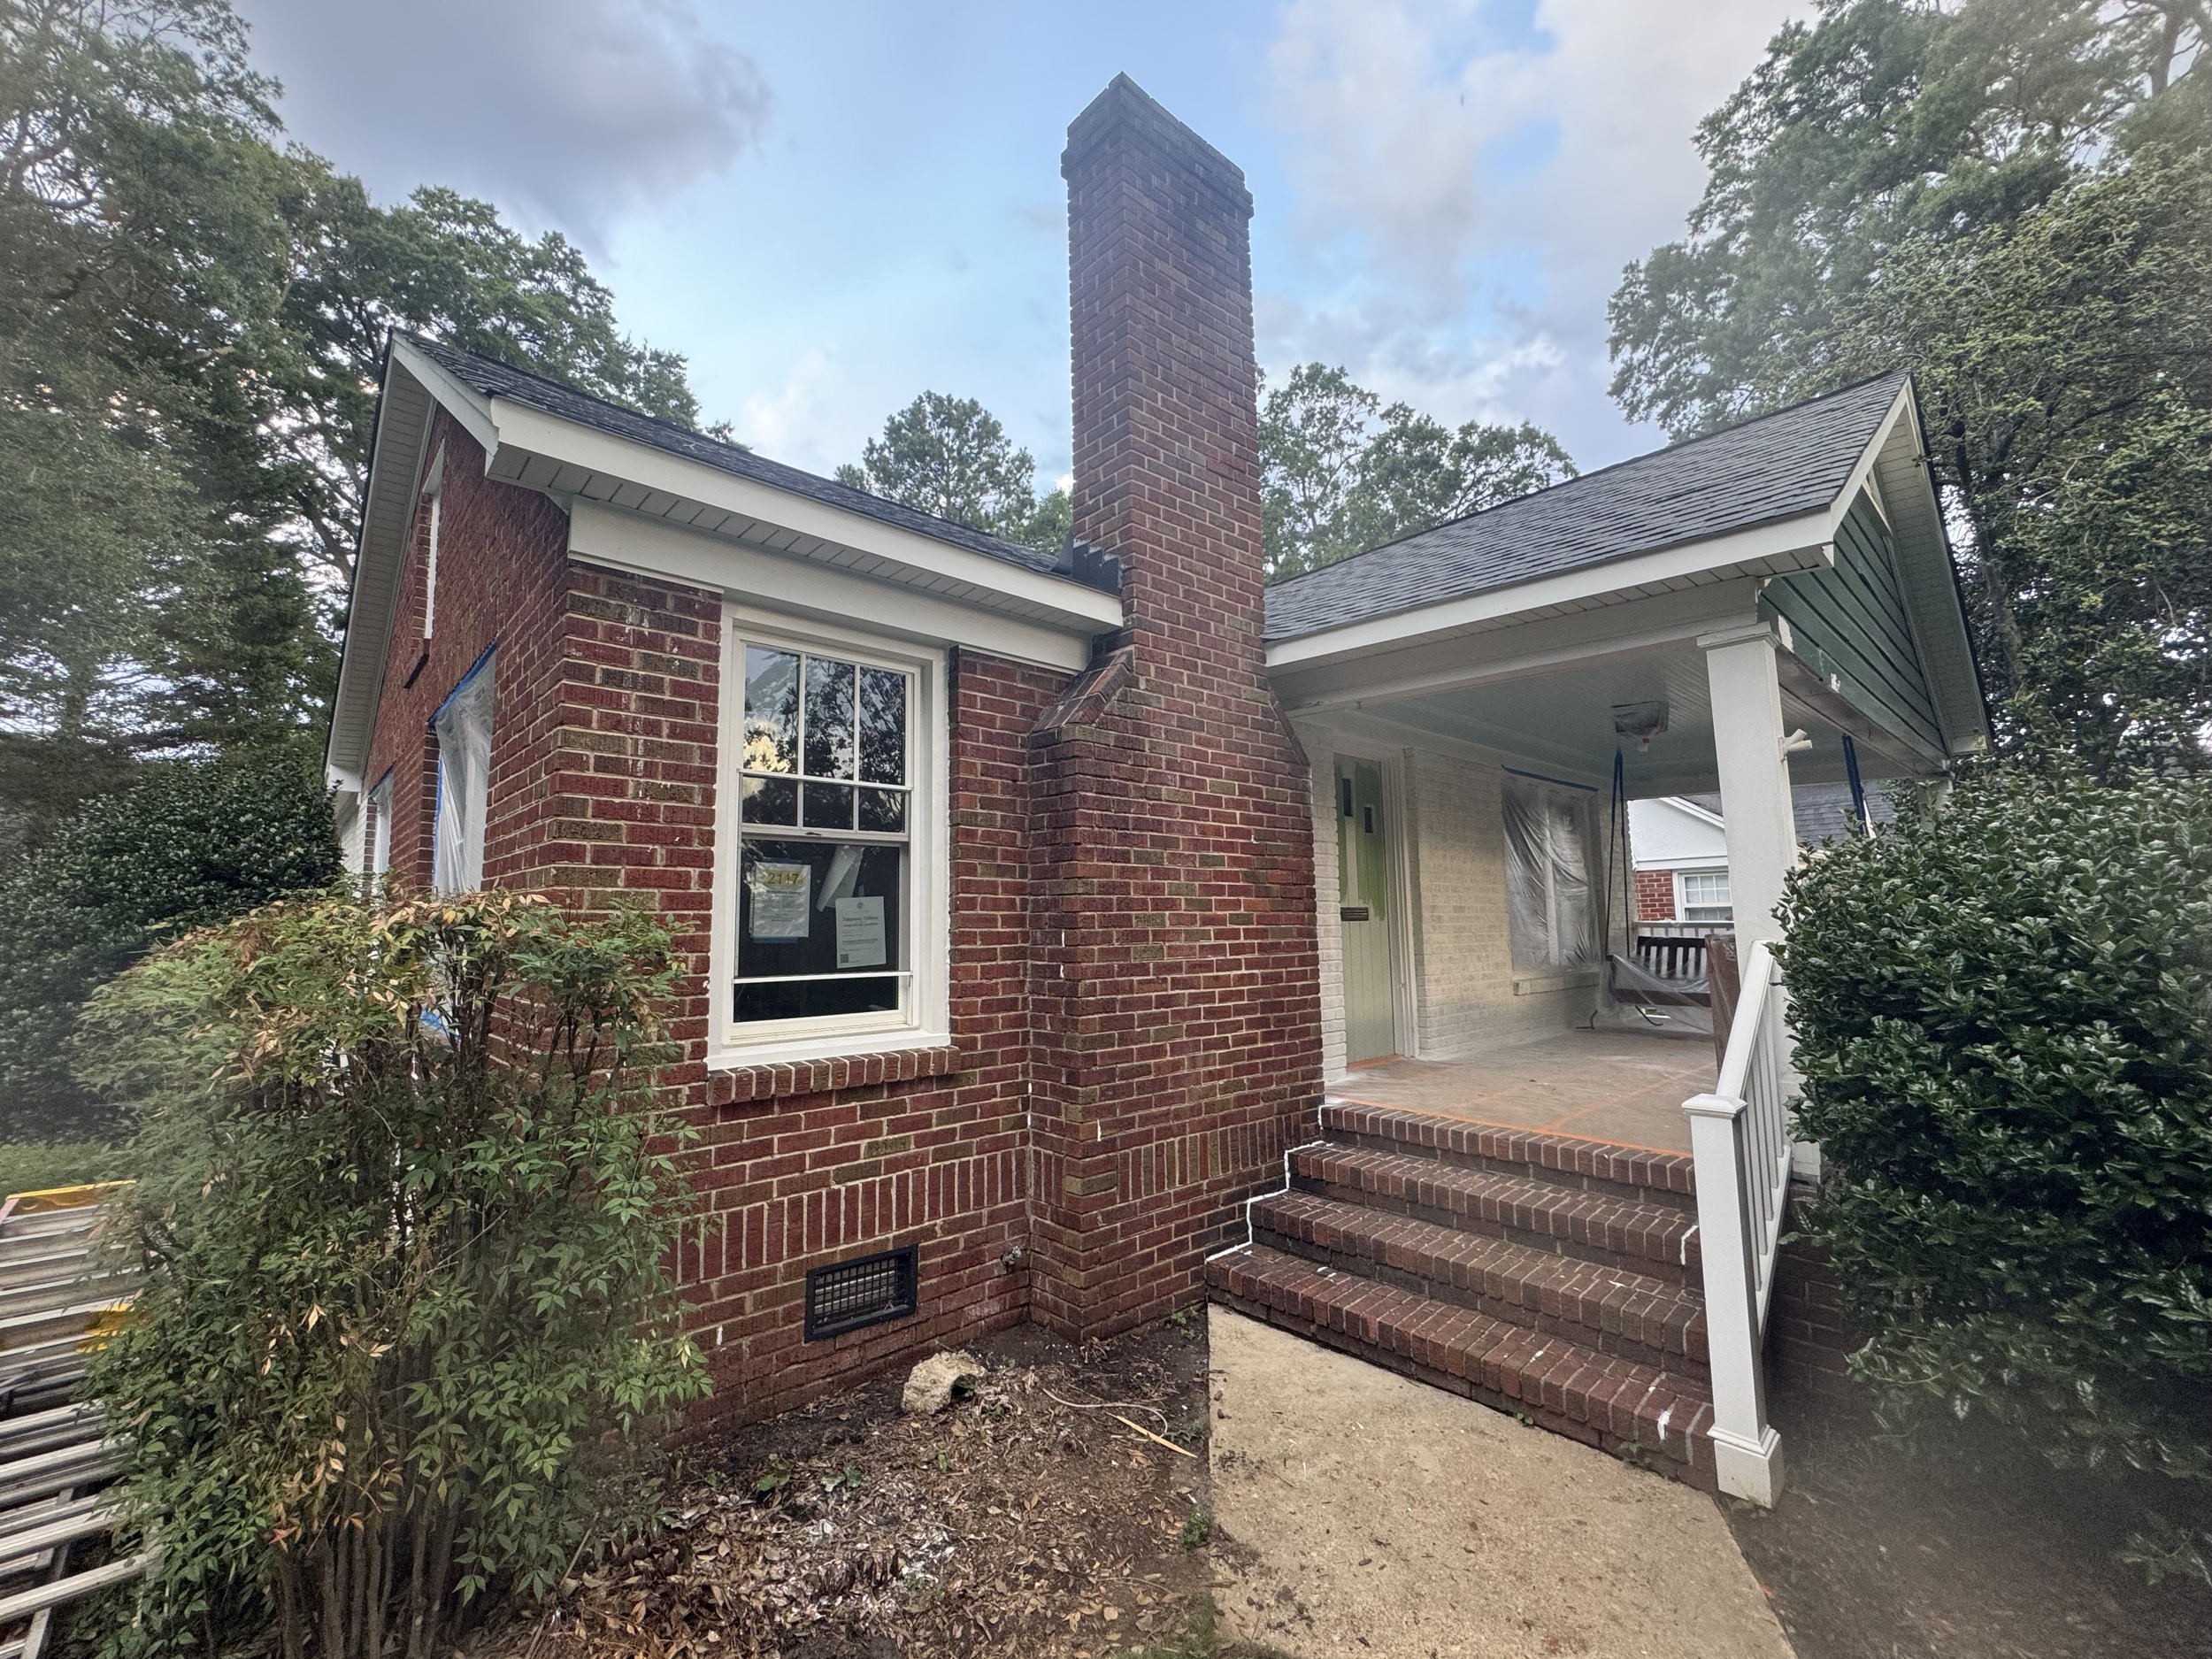
Caption: The porch floor was protected with paper, and the rest of the porch was sprayed with limewash and the beadboard blue paint to start.
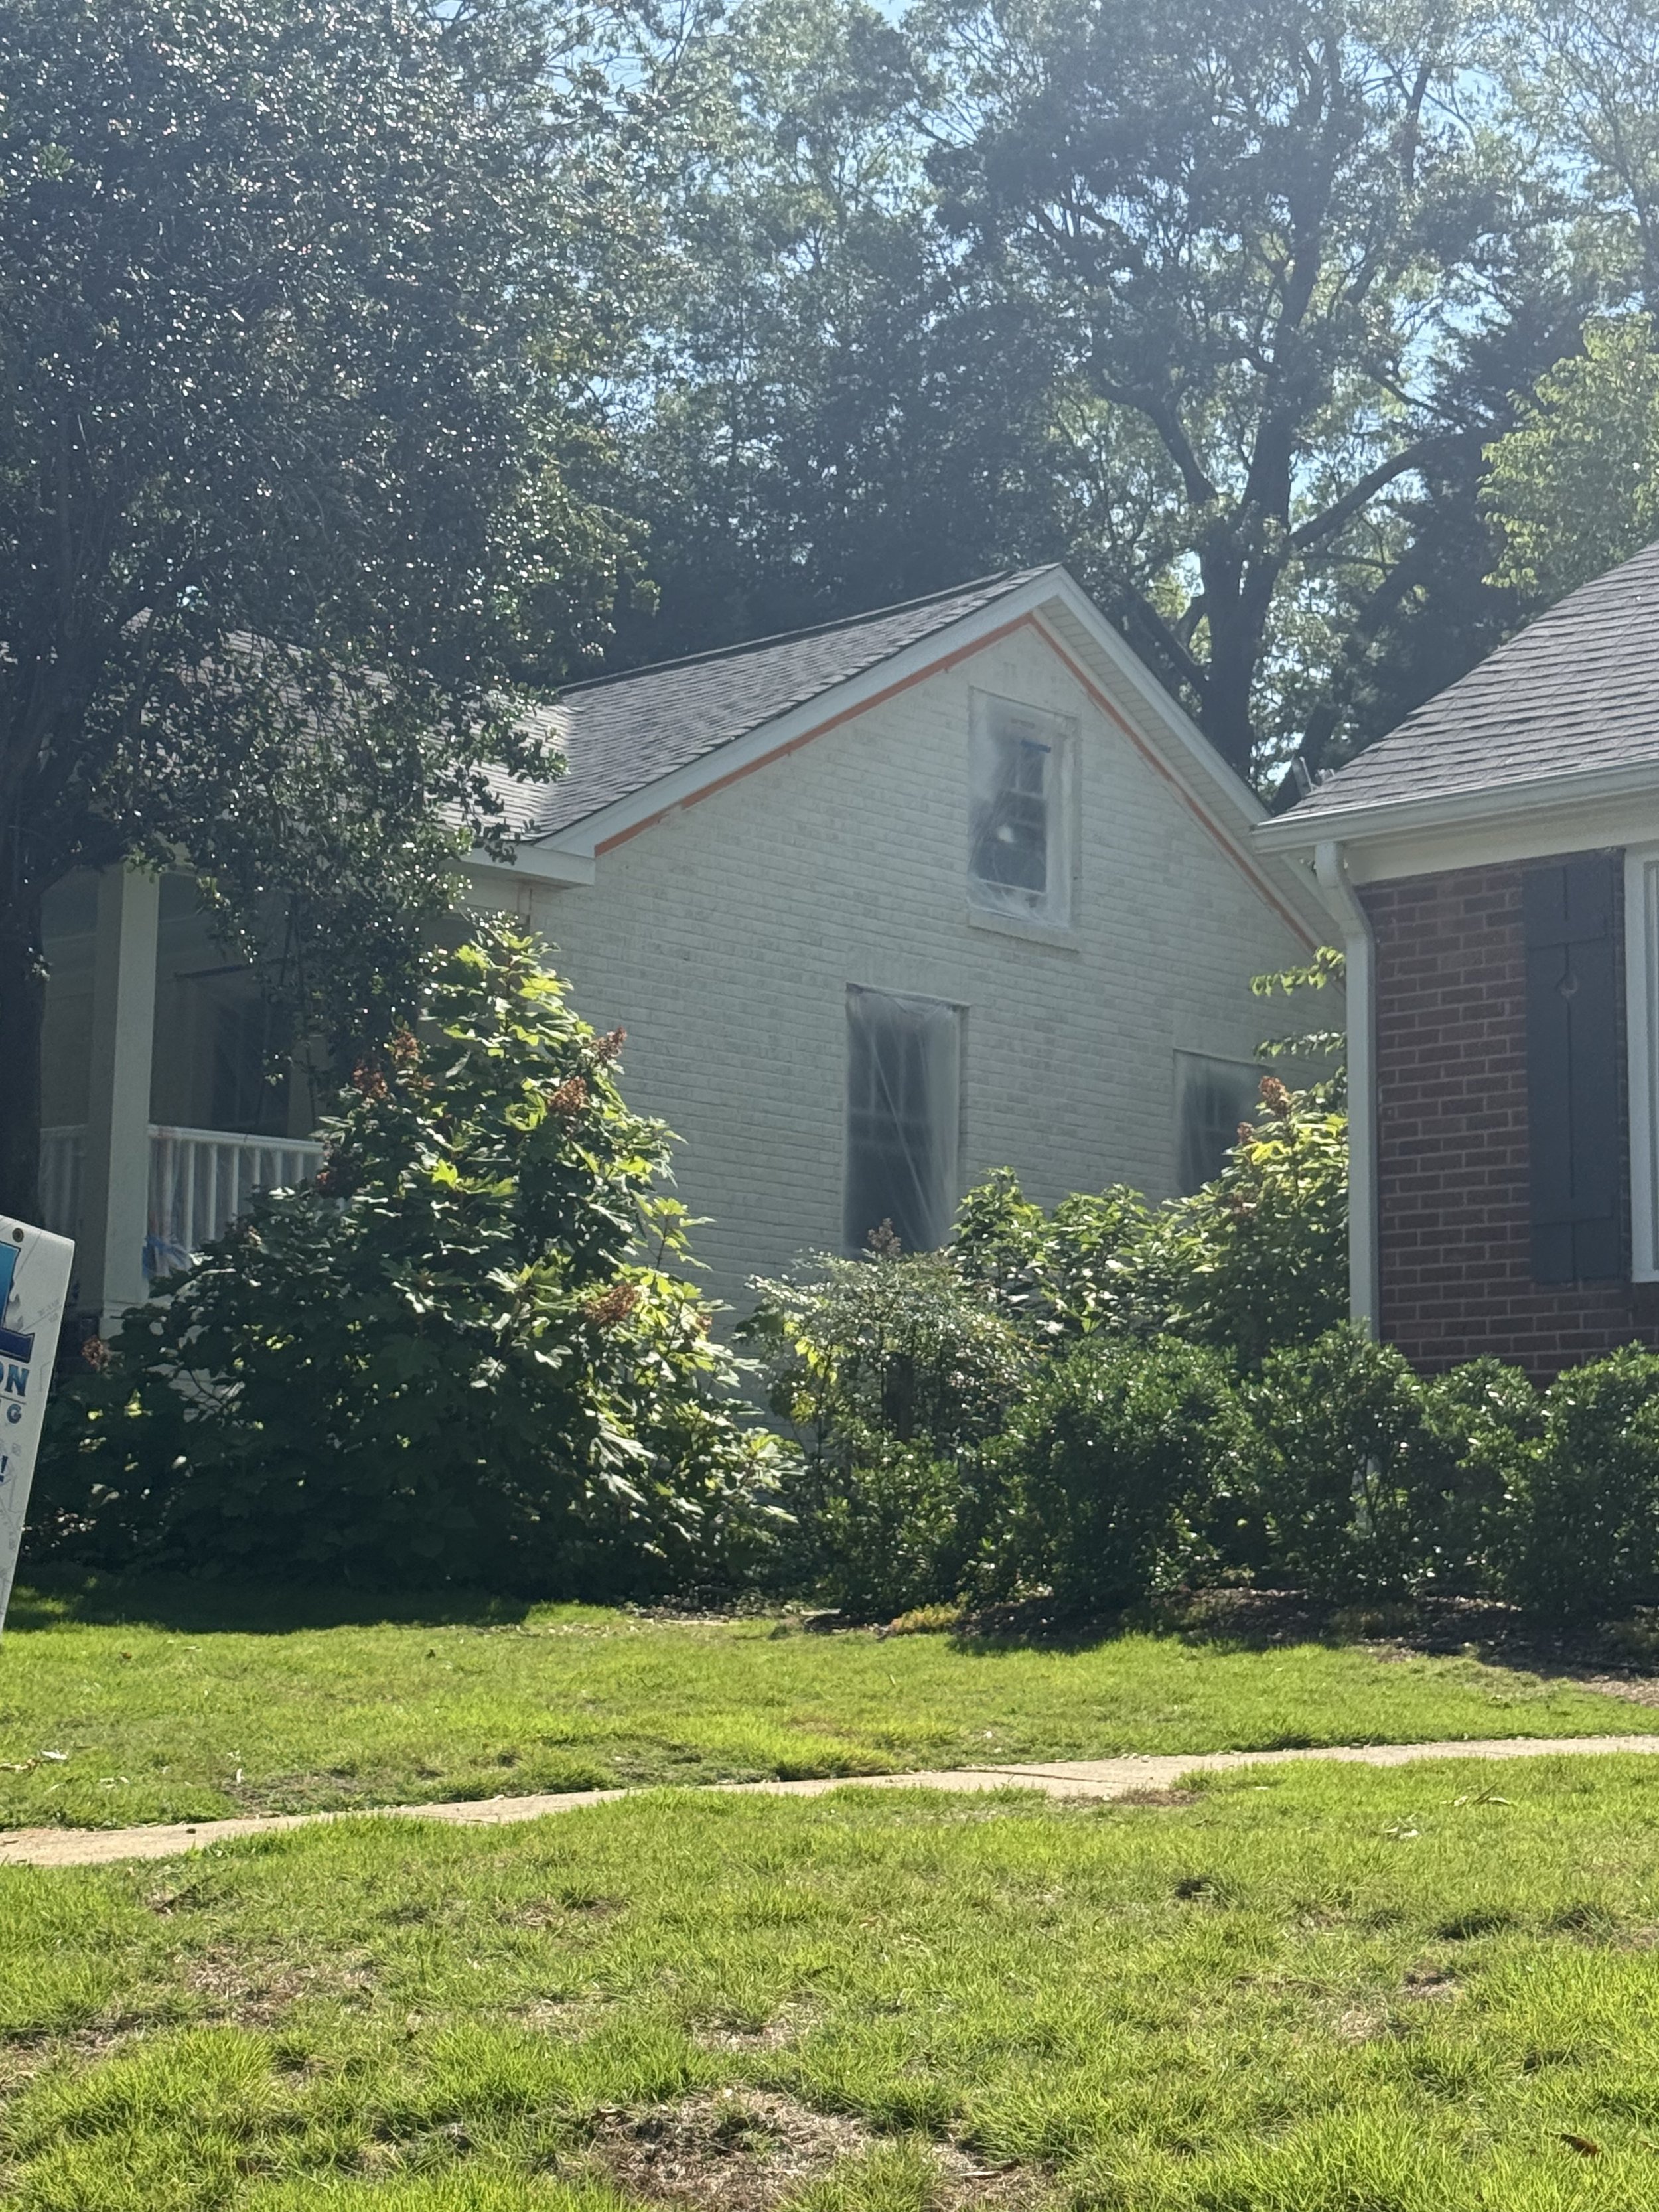
Caption: Once the application process began, the brick painting came together quickly.
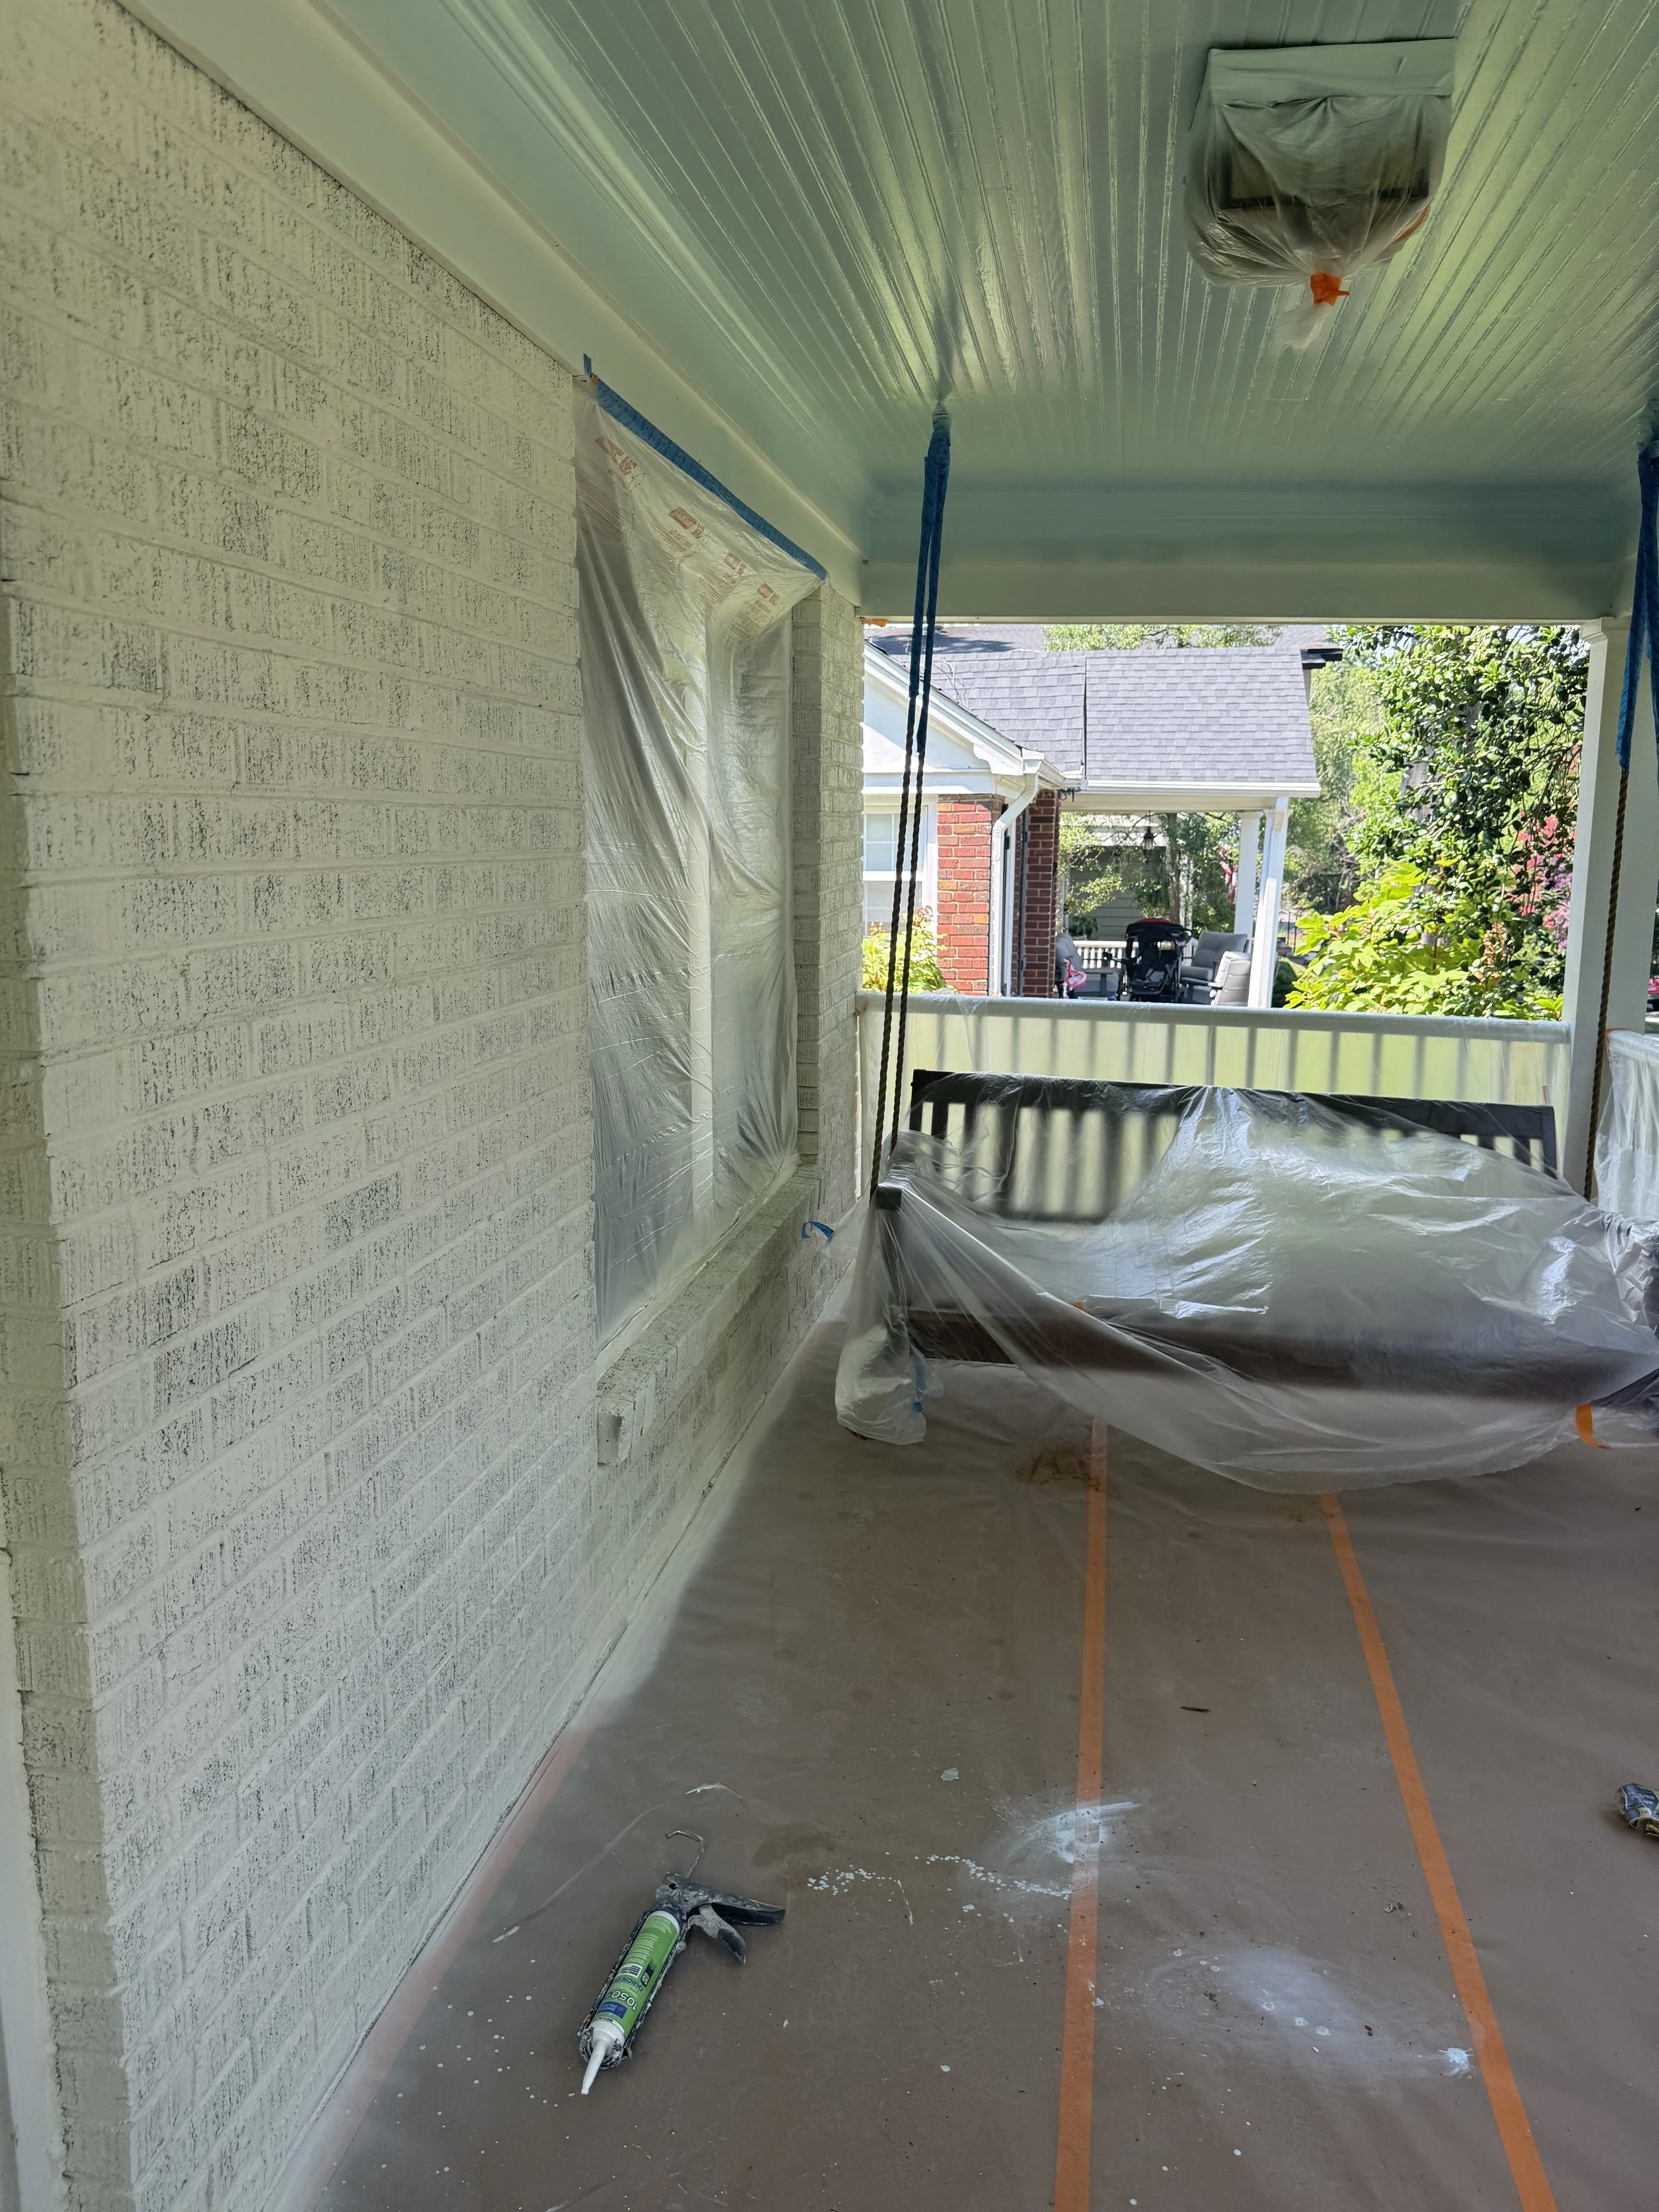
Caption: Here is a closer look at the progress made on the porch.
Exterior painting could not have gone better this go around. Ukie Painting went above and beyond! They did such a good job with the paint and the limewash that our builder crew complimented the team for their professionalism, their workmanship, and their final finished product.
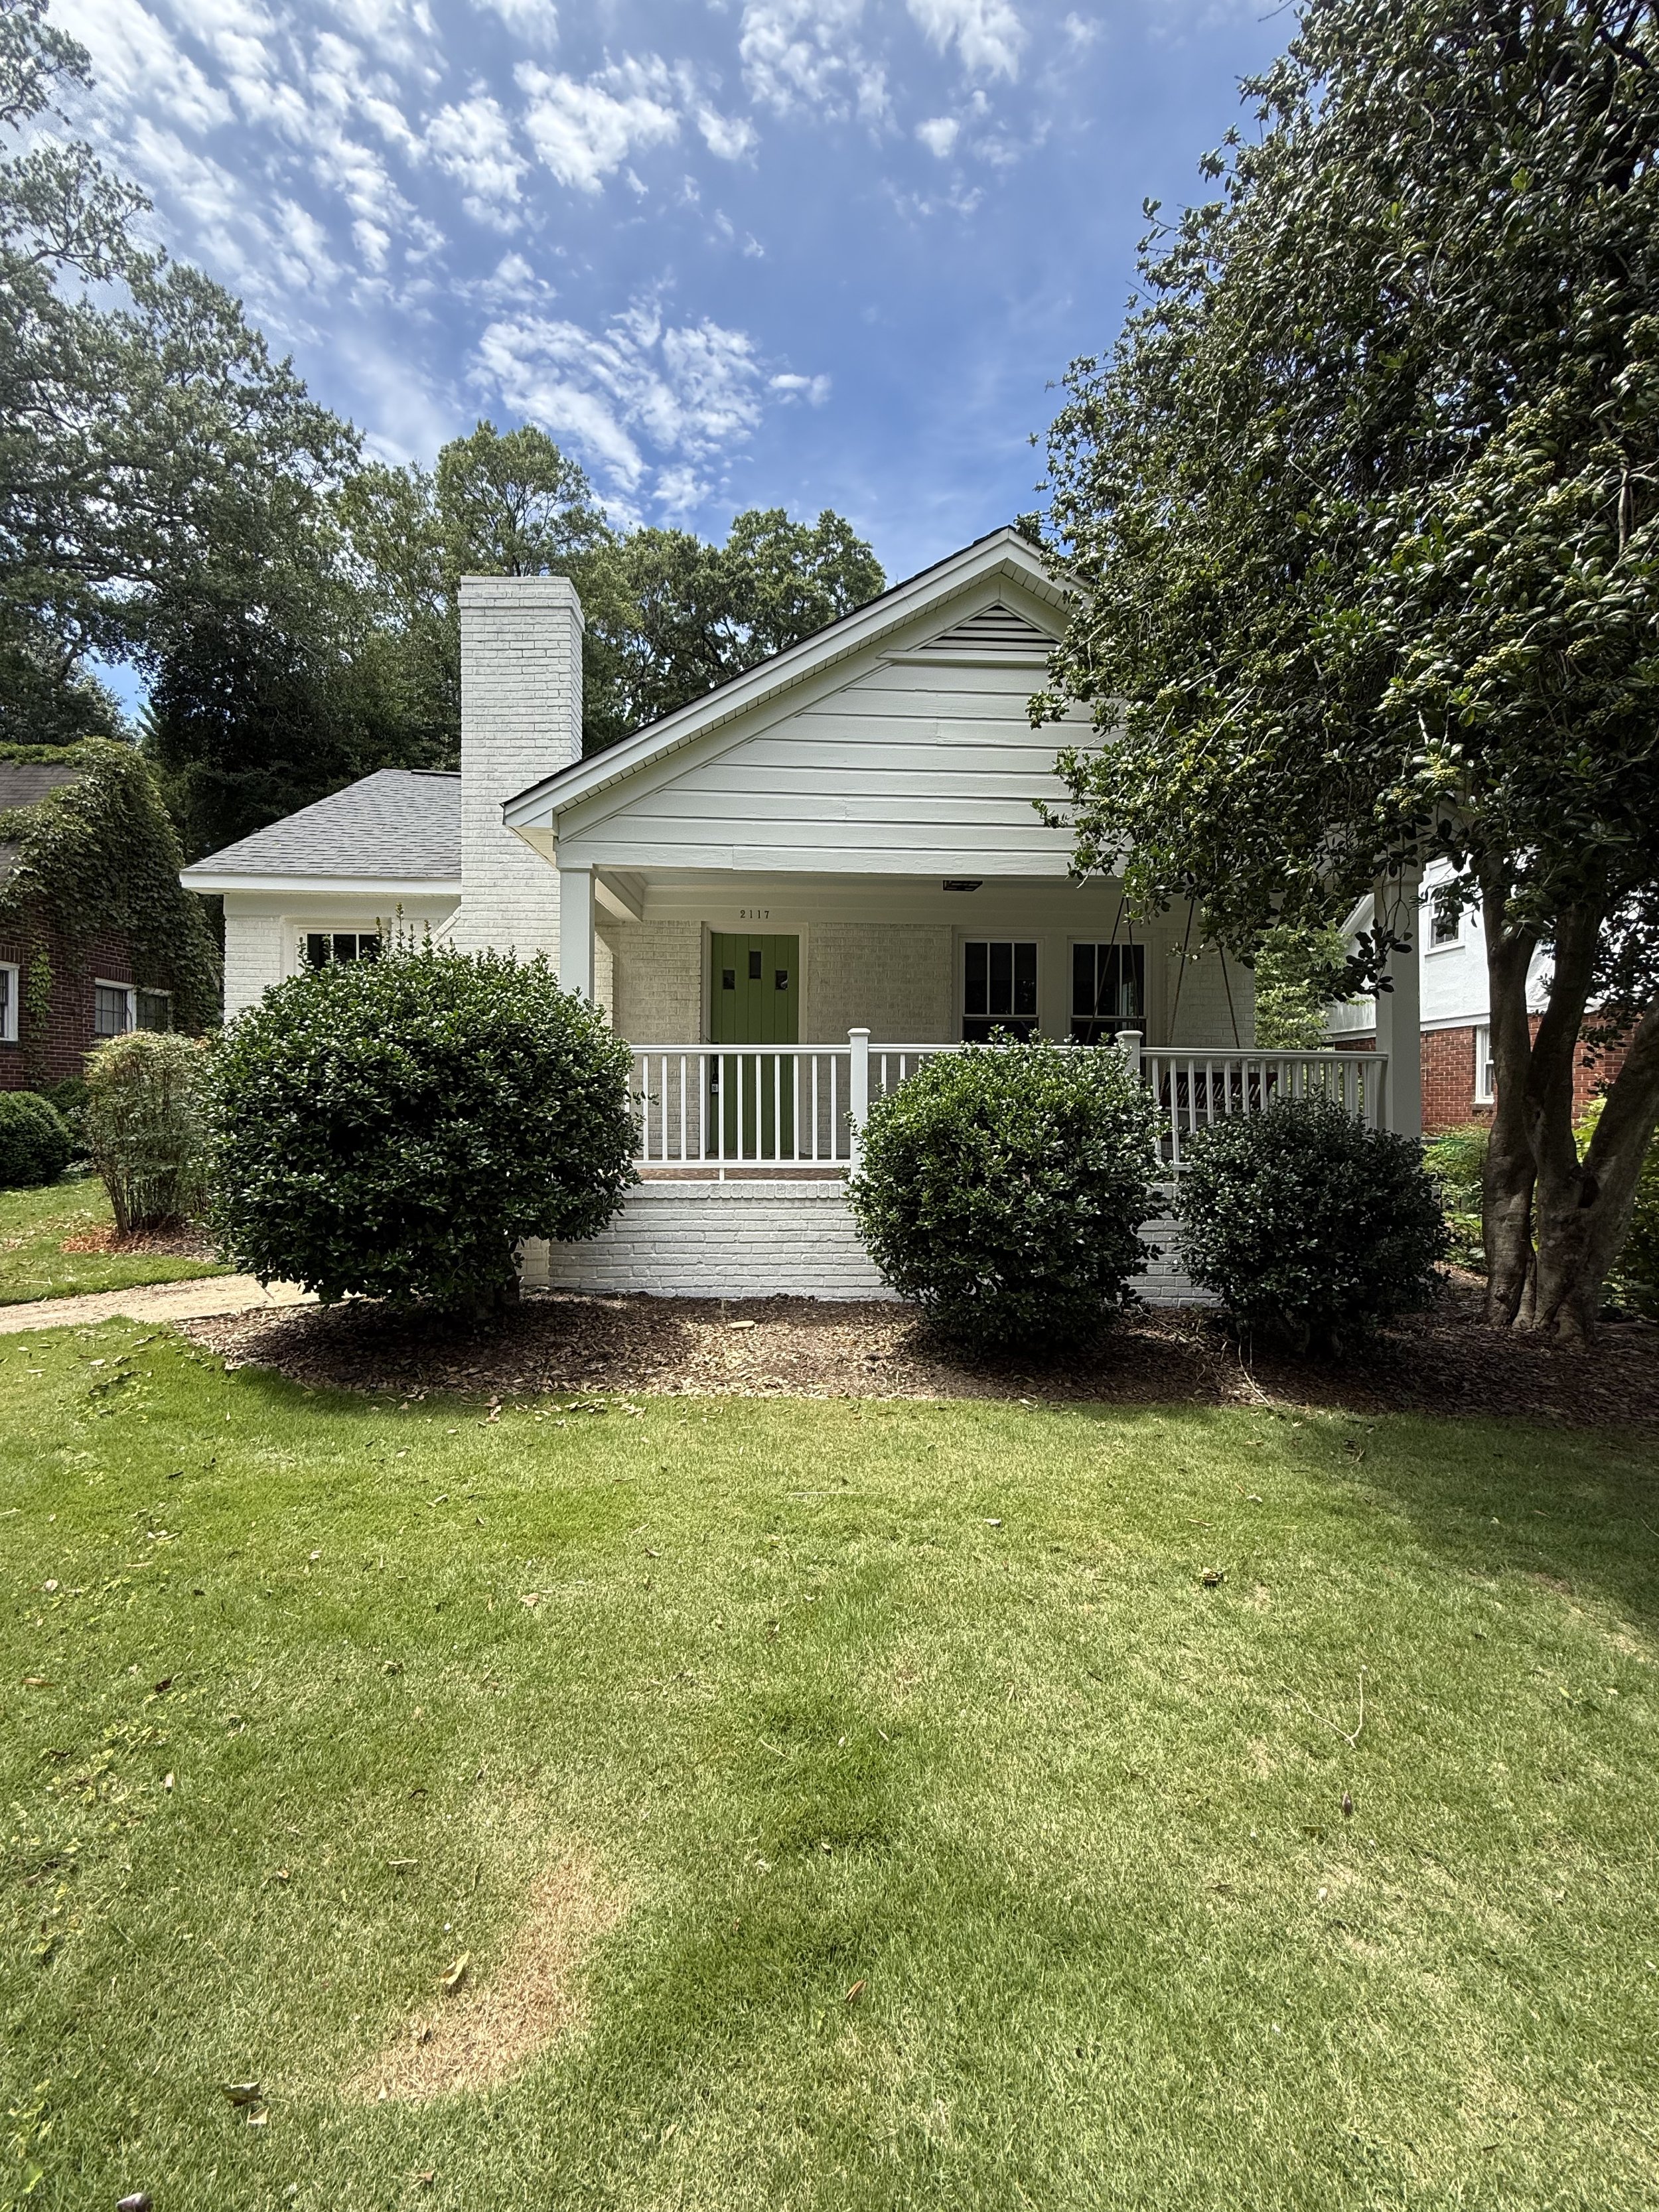
Caption: The big paint reveal! I am so happy with the finished product. Such a happy looking house.
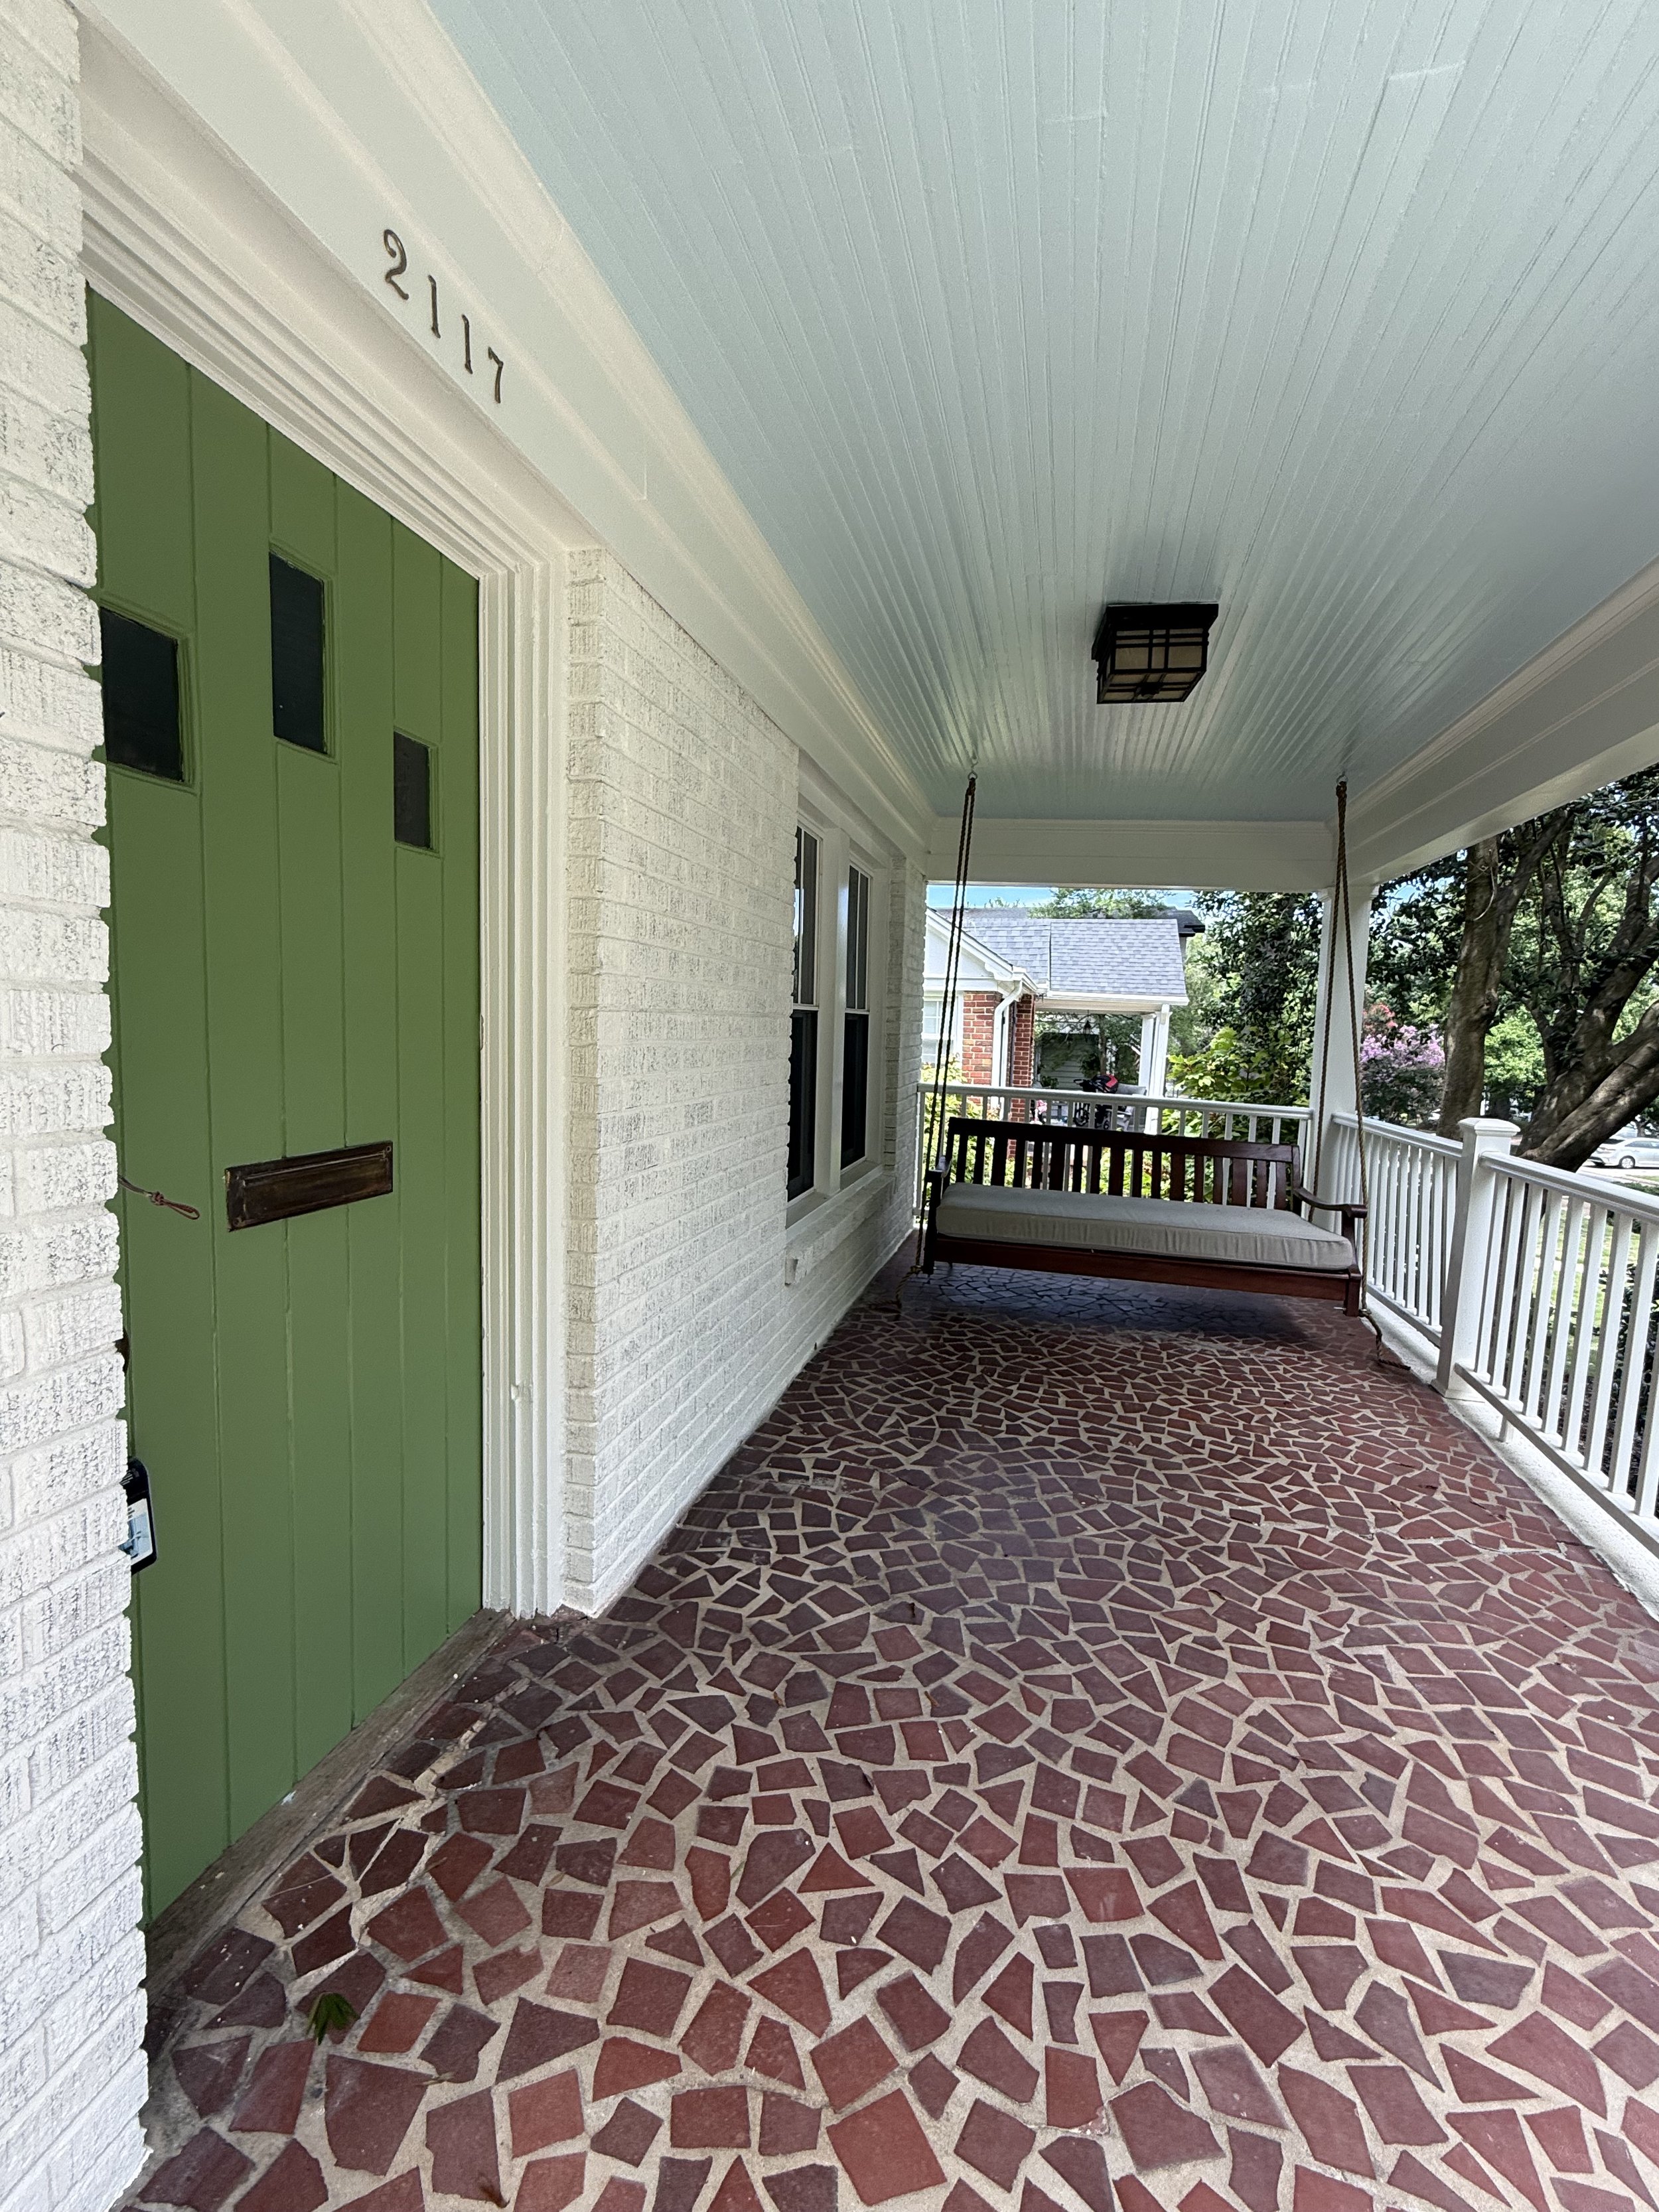
Caption: The front porch is looking so refreshed with the updated door and blue porch ceiling. Notice also the new porch swing daybed and the porch swing rope.
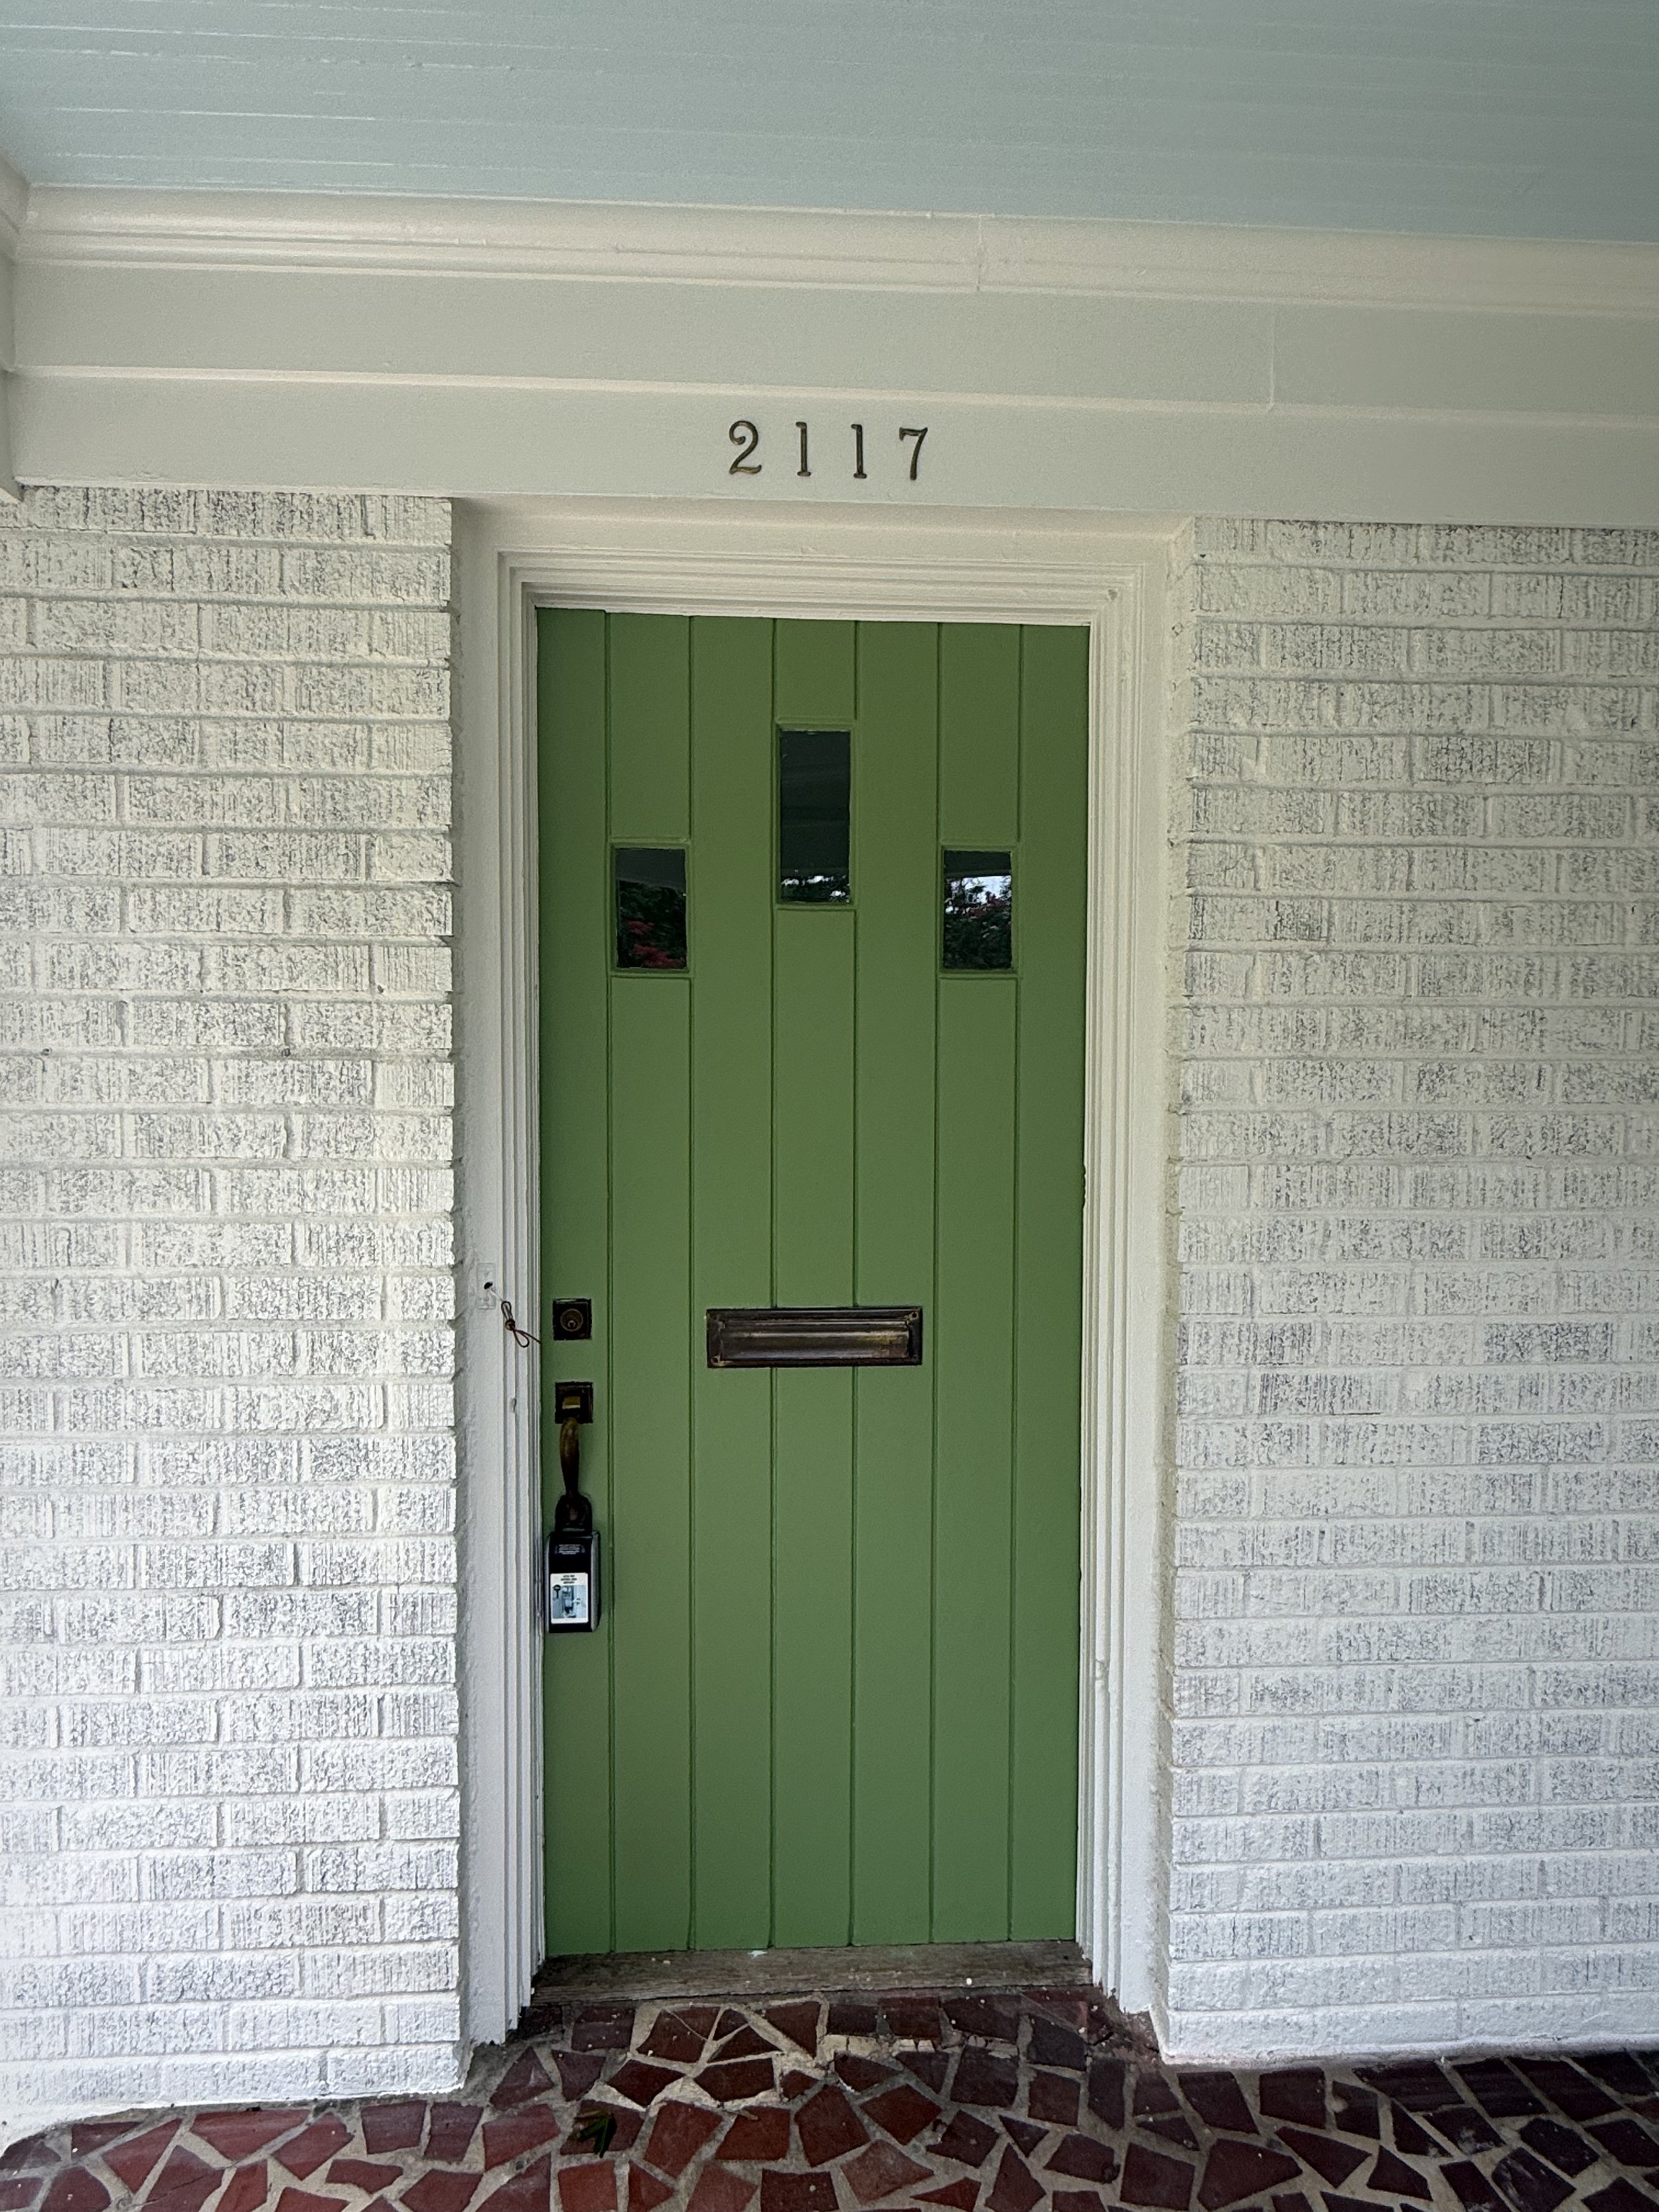
Caption: From a dingy door to the most cheerful looking front door. A+. Next steps include a new doorbell and copper lantern sconces.
I cannot say enough good things about my experience with Ukie Painting. Everyone from Vitalii, Andrii, Cristian, and Carmen were fantastic to work with, and I look forward to the day when we can collaborate on another project together!
I am so happy with the finished product. What do you all think? Do you want the names of all the selected paint colors?